Decadent Raspberry Chocolate Lava Cupcakes Recipe for Any Occasion
Imagine breaking into a perfectly domed chocolate cupcake only to discover a river of warm, molten chocolate and a burst of tart raspberry jam. This Decadent Raspberry Chocolate Lava Cupcakes recipe delivers that exact moment of pure, unadulterated joy. Furthermore, these individual desserts combine the comfort of a classic cupcake with the sophisticated surprise of a lava cake. Consequently, they are the ultimate showstopper for any gathering, from a casual weeknight treat to a celebratory dinner party finale.
The magic of these Raspberry Chocolate Lava Cupcakes lies in their contrasting textures and flavors. You get a rich, tender chocolate crumb that gives way to a luxurious, flowing center. Simultaneously, the raspberry jam introduces a bright, fruity acidity that cuts through the deep cocoa richness. Ultimately, this recipe proves that creating an impressive dessert does not require hours of complex labor. With a straightforward method and common ingredients, you can master this bakery-quality treat in your own kitchen.
These cupcakes are more than just a dessert; they are an experience. The aroma of baking chocolate fills your kitchen, building anticipation. Then, the visual reveal of the molten center when you take that first bite is always met with delight. Whether you are a seasoned baker or a confident beginner, this guide will walk you through every step to ensure your lava cupcakes are flawless every single time.
Quick Recipe Highlights
- Flavor Profile: These cupcakes offer an intense dark chocolate experience beautifully balanced by the sharp, sweet tang of raspberry. The combination creates a sophisticated taste that is neither overly sweet nor bitter.
- Texture: Expect a moist, cakey exterior that yields to an irresistibly gooey, liquid chocolate center. The raspberry jam adds a slight viscosity and fruitiness to the molten core.
- Aroma: As they bake, the deep, warm scent of premium cocoa will permeate your kitchen. Additionally, a subtle note of vanilla and butter completes the inviting fragrance.
- Visual Appeal: The cupcakes boast a perfect dome with a crackly top, dusted elegantly with powdered sugar or cocoa. Cutting one open reveals the stunning lava flow, making for incredible photos.
- Skill Level Needed: This recipe is ideal for bakers with some experience in creaming butter and sugar, and who are comfortable with precise timing. However, clear instructions make it very approachable.
- Special Equipment: You will need a standard 12-cup muffin tin, cupcake liners, and a hand or stand mixer. A piping bag or small spoon is helpful for filling the centers neatly.
Recipe Overview
- Difficulty Level: We rate this recipe as intermediate due to the precise timing required to achieve the perfect molten center without under or over-baking. Managing the batter consistency and filling process also requires a careful hand. However, each step is broken down clearly for success.
- Category: This recipe falls squarely into the dessert category, specifically individual cakes or cupcakes. They are perfect for finishing a meal or serving at a bake sale or party.
- Cuisine: While molten chocolate cake has French origins (as *moelleux au chocolat*), the cupcake format is distinctly American. This recipe is a fusion that celebrates the best of both baking traditions.
- Cost: The cost is moderate, primarily driven by the quality of chocolate and cocoa powder. Using a good raspberry jam is also key. Overall, it is far more affordable than ordering similar desserts at a restaurant.
- Season: These are fantastic year-round but feel particularly cozy in fall and winter. Conversely, the fresh raspberry flavor lends itself beautifully to spring and summer celebrations as well.
- Occasion: These cupcakes are versatile. They are romantic enough for Valentine’s Day or an anniversary, festive for birthdays, and impressive yet simple for holiday dinners or potlucks.
Why You’ll Love This Recipe
First and foremost, the taste and texture combination is utterly irresistible. The rich, dark chocolate cake provides a deep cocoa flavor that chocolate lovers will adore. Meanwhile, the molten center delivers a luxurious, almost pudding-like experience. The raspberry jam is the secret weapon, adding a layer of fruity complexity that prevents the dessert from feeling too heavy. Every bite is a perfect harmony of sweet, tart, and bitter notes that dance on your palate.
From a convenience standpoint, this recipe is remarkably efficient. The total hands-on time is under thirty minutes, and the cupcakes bake in just about twelve. Unlike a large lava cake that requires precise unmolding, the cupcake format is forgiving and easy to serve. You can prepare the batter in advance and refrigerate it, then bake the cupcakes just before serving for a fresh, warm dessert. This make-ahead potential is a huge benefit for entertaining.
While certainly an indulgent treat, this recipe offers some nutritional considerations. Using high-quality dark chocolate provides antioxidants. Raspberries are a great source of vitamin C and fiber. By controlling the ingredients, you can avoid the excessive preservatives and sugars found in store-bought versions. Portion control is also built-in with the cupcake size, helping to manage serving sizes intuitively.
The social and entertaining value of these cupcakes cannot be overstated. They are a guaranteed conversation starter. The dramatic “lava” reveal creates a shared moment of wonder at the table. They are personal and elegant, making each guest feel special. Because they are individual servings, there is no fussing with slicing or plating a large cake. You simply present them on a beautiful platter and let the magic happen.
Finally, this recipe is cost-effective and accessible. The ingredient list is straightforward, with items you likely have in your pantry or can easily find at any grocery store. Investing in one bar of good chocolate makes a world of difference, but you do not need the most expensive brand. Compared to the price of a single molten cake at a restaurant, baking a dozen of these at home offers incredible value and the joy of homemade goodness.
Historical Background and Cultural Significance
The concept of a cake with a liquid center is often credited to French chef Michel Bras, who created the *chocolat coulant* in 1981. Reportedly inspired by the memory of hot chocolate drunk with his family during cold winters, he sought to capture that liquid warmth inside a cake. His original creation was a meticulous and artistic dessert, setting a new standard for pastry innovation. This invention sparked a global fascination with molten-centered desserts, transforming pastry menus worldwide.
In American cuisine, the dessert evolved into the ubiquitous “molten chocolate lava cake.” It became a hallmark of 1990s fine dining, symbolizing a decadent, modern dessert. The shift to a cupcake format is a more recent adaptation, aligning with the booming popularity of cupcakes in the 2000s. This fusion made the elegant dessert more approachable, shareable, and perfect for casual settings. Adding fruit fillings like raspberry is a natural progression, marrying classic flavor pairings with the iconic molten format.
The cultural significance lies in its role as a celebratory dessert. It is often associated with romance and special occasions, frequently appearing on Valentine’s Day menus. The act of breaking into the cake to reveal the hidden center creates a sense of anticipation and delight that is central to its appeal. It represents a moment of indulgence and sensory pleasure, a small luxury that feels accessible to the home cook. Consequently, mastering this recipe feels like unlocking a culinary secret.
Regional variations have emerged globally. In some places, matcha or caramel centers are popular. The addition of raspberry, however, has strong roots in European pastry traditions, where chocolate and red berries are a classic combination. This particular variation honors that tradition while delivering it in a convenient, individual package. The recipe’s journey from a French chef’s inspiration to a beloved American home-baking project is a testament to the beautiful evolution of food culture.
Ingredient Deep Dive
High-Quality Dark Chocolate: Chocolate’s history spans millennia, originating in Mesoamerica. For this recipe, a bar chocolate with 60-70% cocoa solids is ideal. It provides the structure for the molten center and the deep flavor base for the cake. Look for chocolate with cocoa butter listed first, not other fats. It melts smoothly and sets correctly. Store it in a cool, dark place. In a pinch, high-quality chocolate chips can work, but a bar typically has a better texture and melt.
Unsweetened Cocoa Powder: Use natural, non-alkalized cocoa powder for a robust, slightly acidic chocolate flavor that pairs perfectly with the raspberry. Dutch-processed cocoa will work but results in a milder taste. Cocoa powder adds intense color and dryness, which is balanced by the wet ingredients. It is rich in flavonoids. Always sift it with your flour to prevent lumps in your batter. Store it in an airtight container to prevent it from absorbing moisture and odors.
Fresh Raspberries & Raspberry Jam: Raspberries symbolize kindness in folklore and are native to Europe and North America. The jam provides the concentrated fruity burst inside the lava center. For the best flavor, choose a seedless raspberry jam with a high fruit content. You can also use fresh or frozen raspberries pureed with a little sugar. Raspberries are packed with vitamin C, fiber, and antioxidants. The tartness cuts the richness of the chocolate beautifully, creating a balanced dessert.
Butter and Eggs: Use unsalted butter to control the salt level in your recipe. Butter should be at room temperature for proper creaming, which incorporates air for a lighter cake texture. Large eggs, also at room temperature, bind the batter and contribute to the rise and structure. The yolk adds richness and helps emulsify the molten center. Cold ingredients can cause the melted chocolate to seize or result in a dense batter. These foundational ingredients are non-negotiable for the proper texture.
Common Mistakes to Avoid
- Overmixing the Batter: Once you add the dry ingredients, mix only until just combined. Overmixing develops the gluten in the flour, leading to tough, dense cupcakes instead of a tender crumb. Use a spatula to fold gently for the final incorporation.
- Overbaking: This is the most critical error. The cupcakes continue to cook slightly from residual heat after leaving the oven. Bake just until the edges are set but the centers still look slightly soft and underdone. A toothpick inserted into the *cake part* (not the center filling) should have moist crumbs.
- Using Cold Ingredients: Cold eggs or butter will cause the warm melted chocolate to solidify into chunks, creating an uneven batter. Always ensure your dairy and eggs are at true room temperature before you begin the recipe.
- Incorrect Chocolate: Do not use chocolate frosting, syrup, or compound chocolate meant for dipping. You need pure baking chocolate that melts smoothly. Using the wrong type will result in a grainy, oily, or solid center.
- Overfilling the Liners: Fill only 2/3 to 3/4 full. Overfilling causes the batter to spill over the sides, making a mess and potentially causing the cupcakes to collapse because the structure cannot support the weight.
- Skipping the Liner: Even with a non-stick pan, always use cupcake liners. The molten center is more likely to stick to the pan, and liners make for easy, clean removal and presentation.
- Not Testing One First: If you are unsure about your oven’s accuracy, bake a single test cupcake to check the timing. Oven temperatures can vary, and this saves an entire batch from being over or undercooked.
- Serving Cold: The lava effect is best when warm. Let the cupcakes cool for only 2-3 minutes before serving. If they sit too long, the center will solidify, and you will lose the magical molten texture.
Essential Techniques
Creaming Butter and Sugar: This foundational technique incorporates air into your batter, which is crucial for lift and a light texture. Use room-temperature butter and beat it with the sugar on medium-high speed for 3-5 minutes until the mixture is pale, fluffy, and increased in volume. The sugar crystals carve tiny air pockets into the fat. If the butter is too soft or melted, you cannot achieve this aeration, resulting in a flat, heavy cake.
Tempering Eggs with Chocolate: After melting your chocolate and butter, the mixture will be hot. Adding cold eggs directly would scramble them. Instead, you must slowly “temper” the eggs by whisking in a small amount of the hot chocolate mixture to gently warm them. Then, you can safely whisk this egg-chocolate mixture back into the main pot. This step prevents curdling and ensures a smooth, emulsified batter for a silky lava center.
The “Muffin Method” for Combining: This recipe uses a hybrid method. You cream butter and sugar, then incorporate eggs and vanilla. Meanwhile, you mix the dry ingredients (flour, cocoa, etc.) in a separate bowl. Finally, you alternately add the dry ingredients and the milk to the butter mixture, beginning and ending with the dry ingredients. This method prevents overmixing and ensures the batter stays tender and well-hydrated.
Creating the Lava Center: The secret is a solid piece of filling placed inside the batter. By chilling the raspberry jam briefly, it becomes firmer and less likely to fully dissolve into the batter during baking. As the cupcake bakes, the cake sets around the filling, which melts into a gooey pocket. Ensuring the filling is fully enclosed by batter is key to preventing it from leaking out during baking.
Pro Tips for Perfect Raspberry Chocolate Lava Cupcakes
Chill your raspberry jam for 15-20 minutes before assembling. This makes it much easier to handle and helps it hold its shape as a distinct center until the heat of the oven melts it.
Use a cookie scoop or two spoons to portion the batter evenly. Consistency in batter amount leads to even baking times and uniform cupcakes.
For a professional look, dust the cooled cupcakes with a mixture of powdered sugar and cocoa powder using a fine-mesh sieve. This adds visual contrast and a hint of extra flavor.
If your cupcakes dome too much, you can slice off the very top to create a flat surface for dusting. Alternatively, you can embrace the rustic, crackly top as part of their charm.
To check for doneness, look for the edges of the cupcakes to be fully set and pulling slightly away from the liner. The very center of the top should still look a bit wet and jiggle slightly when you gently move the pan.
Let the cupcakes rest in the pan for exactly 2 minutes after baking. This allows them to set just enough to handle but ensures the centers are still gloriously molten when served.
For an extra flavor boost, add a pinch of espresso powder or instant coffee to the dry ingredients. It will not taste like coffee but will deepen and enhance the chocolate flavor.
Variations and Adaptations
Regional Variations: Explore global flavors by changing the filling. Use dulce de leche for a Latin-inspired twist, matcha white chocolate ganache for a Japanese touch, or a salted caramel center. The basic chocolate cupcake batter is a perfect canvas for countless cultural flavor infusions.
Seasonal Adaptations: In fall, fill the centers with spiced apple butter or a pumpkin butter. For winter holidays, use a peppermint ganache. In summer, a fresh blueberry or peach compote works wonderfully. Match your filling to the freshest, most vibrant produce of the season.
Dietary Modifications: For a gluten-free version, use a 1:1 gluten-free flour blend. For dairy-free, use plant-based butter and a high-quality dairy-free dark chocolate. Ensure your jam is also compliant. Vegan adaptations are trickier due to the egg’s role but can be attempted with a flax egg and careful recipe testing.
Flavor Variations: Infuse the batter itself with different extracts. Try adding a teaspoon of orange extract or a tablespoon of liqueur like Chambord, Grand Marnier, or Amaretto to the wet ingredients for an adult twist.
Texture Modifications: For a crunchier texture, fold 1/4 cup of chopped toasted nuts like hazelnuts or pecans into the batter. You could also place a whole raspberry or a few chocolate chips in the center alongside the jam for a surprise.
Presentation Alternatives: Skip the liners and bake directly in greased and cocoa-dusted ramekins for a more traditional lava cake presentation. Serve them directly in the ramekin with a dollop of whipped cream on top.
Serving and Presentation Guide
Plating is simple but impactful. Place each warm cupcake on a small dessert plate or in a shallow bowl. Using a fine-mesh sieve, dust the top generously with powdered sugar, cocoa powder, or a combination of both. This creates an elegant, finished look and a hint of extra sweetness. For a restaurant-style touch, you can add a quenelle of vanilla ice cream or a dollop of freshly whipped cream right beside the cupcake.
Garnishing elevates the dessert visually and adds texture. Place a single fresh raspberry and a mint leaf on top of the whipped cream. Alternatively, drizzle a thin zigzag of raspberry coulis or melted chocolate on the plate before setting the cupcake down. A sprinkle of edible gold flakes or chocolate shavings adds a touch of luxury for very special occasions.
Traditional accompaniments include vanilla bean ice cream, which melts into the warm lava beautifully. Freshly whipped cream or a crème anglaise are also classic choices. For a contrasting temperature, a small scoop of raspberry sorbet is refreshing and enhances the berry flavor. A glass of cold milk is always a beloved pairing for both kids and adults.
Modern serving suggestions might include deconstructing the elements. Serve the cupcake alongside a shot glass of warm chocolate sauce for dipping and a small bowl of fresh berries. For a party, create a “lava cupcake bar” with toppings like flavored whipped creams, sprinkles, crushed cookies, and various sauces for guests to customize their dessert.
Temperature is paramount. Serve the cupcakes within 5-10 minutes of leaving the oven for the true lava effect. All accompaniments should be ready before the cupcakes go into the oven. Have your ice cream scooped, cream whipped, and plates set out so you can assemble and serve immediately.
Portion control is inherent in the cupcake size. One per person is standard. However, for a larger buffet or a richer meal, you can make mini versions using a mini muffin tin, adjusting the bake time down to 8-10 minutes. These are perfect for allowing guests to sample other desserts as well.
Wine and Beverage Pairing
Wine pairings should complement the rich chocolate and bright raspberry. A classic pairing is a Brachetto d’Acqui or a Lambrusco—lightly sparkling, low-alcohol red wines with sweet berry notes that mirror the dessert. A late-harvest Zinfandel or Port also stands up to the intensity. For a more contrasting pairing, a rich, creamy Madeira or a Banyuls dessert wine offers nutty complexity that works wonderfully with dark chocolate.
Non-alcoholic alternatives are just as important. A glass of cold, whole milk is a timeless choice. For something more sophisticated, try a sparkling raspberry lemonade or a black cherry soda. A rich, creamy hot chocolate or a dark roast coffee also makes an excellent companion, doubling down on the chocolate theme.
Coffee and tea pairings are exceptional. A medium-roast coffee with low acidity won’t compete with the dessert’s flavors. An espresso provides a bold, bitter counterpoint that can cleanse the palate. For tea, consider a smoky Lapsang Souchong, a malty Assam, or a fruity Rooibos blend. The warmth of the beverage contrasts nicely with the cool ice cream if served.
Temperature considerations for beverages depend on the season. In colder months, a hot tea or coffee is comforting. In warmer weather, iced coffee, cold milk, or a chilled dessert wine is more refreshing. Always consider the overall temperature balance of your dessert plate when choosing your drink.
Serving suggestions include offering a small pour of dessert wine in a proper glass alongside the cupcake. For coffee, consider serving it in a small cup or even as an affogato poured over the ice cream accompaniment. Presentation of the beverage itself adds to the overall dining experience.
Storage and Shelf Life
Storage methods for leftovers are limited due to the nature of the molten center. Once cooled completely, the lava will solidify. You can store cooled cupcakes in an airtight container at room temperature for 1 day. For longer storage, refrigerate for up to 3 days. The texture will be more of a dense, fudgy cupcake with a soft jam center—still delicious, but not “lava.”
Temperature requirements are straightforward. Never store warm cupcakes in a sealed container, as condensation will make them soggy. Always let them cool to room temperature on a wire rack first. If refrigerated, bring them to room temperature for an hour before serving, or warm gently in the microwave for 10-15 seconds to soften the interior slightly.
Container recommendations include a standard cupcake carrier or a large airtight container. If stacking, place a layer of parchment paper between layers to prevent sticking. Do not wrap individually in plastic wrap while still warm, as it will stick to the tops and ruin your dusting.
Signs of spoilage are typical for baked goods. Look for any mold, especially on the fruit-based filling, or an off smell. The cupcakes will dry out and become stale after a few days. Because they contain dairy and eggs, do not leave them at room temperature for more than two days.
Reheating instructions can partially restore the lava effect. Microwave a refrigerated cupcake for 20-25 seconds on medium power. The center may become warm and soft again, though not fully liquid. A conventional oven at 300°F for 5-8 minutes can also work but may dry out the edges.
Freezing guidelines: You can freeze unfilled baked cupcakes for up to 2 months. Wrap them individually in plastic wrap and then place in a freezer bag. Thaw at room temperature. However, you cannot successfully freeze the filled, unbaked batter or the finished lava cupcakes, as the filling will separate and the texture will be compromised upon thawing and reheating.
Make Ahead Strategies
Prep timeline is very flexible. You can prepare the chocolate batter up to 24 hours in advance. Simply cover the bowl tightly with plastic wrap and refrigerate. The cold batter will be thick. When ready to bake, let it sit at room temperature for 30 minutes to soften slightly, then portion into liners and proceed with adding the chilled jam filling. This is perfect for dinner parties.
Storage between steps is simple. The chilled jam filling can be prepared days in advance and kept in the fridge. You can also measure out all your dry ingredients into a bowl and have your wet ingredients ready at room temperature. Mise en place makes the actual mixing process quick and stress-free.
Quality impact assessment shows that the make-ahead batter actually benefits from resting. The flour hydrates more fully, and the flavors meld, potentially resulting in a more tender and flavorful cupcake. The key is bringing the batter back to a scoopable consistency before baking. Do not try to bake it straight from the fridge, as it will not rise properly.
Assembly tips for make-ahead: If you’ve refrigerated the batter, use a cookie scoop or an ice cream scoop to portion it into the liners, as it will be stiff. You may need to use a spoon to help press it into the liner. Then, make the well and add the cold jam as usual. The baking time may need an extra minute since you’re starting with a colder batter.
Reheating guidelines do not apply to the make-ahead unbaked batter. For any leftover baked cupcakes, follow the reheating instructions in the storage section. The goal of make-ahead is to have fresh-baked cupcakes, so plan to bake them just before serving for the ultimate experience.
Fresh element additions should always be done post-bake. Any whipped cream, ice cream, fresh berries, or powdered sugar dusting should be added right before serving. This ensures the best texture and visual appeal for your finished Decadent Raspberry Chocolate Lava Cupcakes.
Scaling Instructions
Halving the recipe is straightforward for a smaller batch of 6 cupcakes. Simply divide all ingredient quantities by two. Use a standard 6-cup muffin tin. Baking time may be reduced by 1-2 minutes, so start checking at 10 minutes. Be precise with measurements, especially the egg. For one egg, lightly beat it, then use approximately 2 tablespoons of the mixture.
Doubling or tripling the recipe is easy for a crowd. Double all ingredients. You will likely need to bake in multiple batches unless you have multiple ovens and muffin tins. Do not overcrowd your oven racks, as this affects air circulation and baking time. Rotate the pans halfway through baking for even browning. Consider the capacity of your mixing bowl when scaling up.
Equipment adjustments may be necessary when scaling. For a double batch, ensure your stand mixer bowl is large enough, or mix in two separate batches. You may need additional muffin tins. If you only have one tin, have the batter for the second batch ready to go as soon as the first comes out of the oven. The batter can sit briefly while the first batch bakes.
Timing modifications are minimal when scaling up or down. The bake time per batch remains roughly the same (11-13 minutes). However, when baking multiple trays at once, they may take a minute or two longer. Always rely on visual cues—set edges, soft centers—rather than strictly on the timer when baking in a different configuration than the original recipe.
Storage considerations for scaled batches are the same. Baked cupcakes store the same way regardless of batch size. For large batches made for events, plan your baking schedule so the cupcakes are as fresh as possible. You can bake a few hours ahead and keep them covered at room temperature, then warm very briefly before serving if desired.
Nutritional Deep Dive
Macro breakdown per cupcake will vary but generally includes a balance of carbohydrates from sugar and flour, fats from butter and chocolate, and a small amount of protein from eggs and flour. The raspberry jam adds simple sugars and a trace of fiber. This is an energy-dense treat meant for occasional enjoyment, providing a quick source of calories primarily from fats and carbohydrates.
Micronutrient analysis reveals benefits from the dark chocolate and raspberries. Dark chocolate provides iron, magnesium, copper, and manganese, along with antioxidants like flavonoids. Raspberries contribute vitamin C, vitamin K, and manganese. Using natural cocoa powder also adds polyphenols. While not a health food, choosing high-quality ingredients maximizes the nutritional benefits within this indulgent framework.
Health benefits are linked to the specific ingredients. The flavonoids in dark chocolate may support heart health and cognitive function. The antioxidants in raspberries combat oxidative stress. The mental health benefit of enjoying a lovingly made, delicious dessert should also not be underestimated as part of a balanced lifestyle.
Dietary considerations are important for those with restrictions. This recipe contains gluten, dairy, and eggs. It is not suitable for vegan, dairy-free, or gluten-free diets without significant modifications. The sugar content is also notable. Always check with guests about allergies before serving.
Portion analysis is built-in. One cupcake is a defined serving, which helps with mindful eating. The richness of the dessert means one is usually satisfying, preventing the need for a second serving. This natural portion control is a benefit compared to slicing from a larger cake where serving size can be ambiguous.
Weight management tips include enjoying this as a planned treat within your daily calorie goals. You can balance it with lighter meals earlier in the day. Savor it slowly to maximize satisfaction. Remember, deprivation often backfires; incorporating special desserts like these Raspberry Chocolate Lava Cupcakes in moderation is key to a sustainable, happy relationship with food.
Dietary Adaptations
Gluten-Free: Substitute the all-purpose flour with a 1:1 gluten-free baking blend that contains xanthan gum. Brands like Bob’s Red Mill or King Arthur Measure for Measure work well. Be careful not to overmix the batter after adding the GF flour, as it can become gummy. The texture may be slightly more delicate but still delicious.
Dairy-Free: Use a high-quality vegan butter stick (not spread) and a plain, unsweetened non-dairy milk like oat or almond milk. Choose a dairy-free dark chocolate bar carefully, as some still contain milk solids. Ensure your raspberry jam is also dairy-free. The results can be nearly identical to the original.
Vegan: This is the most challenging adaptation. Use dairy-free butter and chocolate. For the egg, a commercial egg replacer or a “flax egg” (1 tbsp ground flax + 3 tbsp water per egg) may work, but it will change the texture significantly, potentially making the center less fluid. This requires experimentation for best results.
Low-Carb/Keto: Use almond flour and a keto-friendly sweetener like erythritol or monk fruit blend. Replace the jam with a sugar-free raspberry chia jam. Use very high-percentage dark chocolate or unsweetened baking chocolate and adjust sweetener accordingly. The texture will be different—more fudgy than cakey—and baking time may need adjustment.
Refined Sugar-Free: Substitute granulated sugar with coconut sugar. Use a dark chocolate sweetened with coconut sugar or a low-glycemic alternative. Make your own raspberry jam sweetened with a small amount of maple syrup or honey. Note that coconut sugar will darken the color of the cupcakes.
Troubleshooting Guide
Texture Issues (Dense/Gummy Cupcakes): This is usually from overmixing the batter after adding the flour, which develops gluten. It can also happen if you overbake, driving out too much moisture. Ensure you mix until just combined and adhere strictly to the bake time. Using a kitchen scale for precise flour measurement prevents accidentally using too much, which also causes density.
Flavor Balance (Not Chocolatey Enough): The quality of cocoa powder and chocolate is paramount. Use a natural, high-fat cocoa powder and a dark chocolate bar with at least 60% cocoa solids. A pinch of salt in the batter is essential to enhance the chocolate flavor. As mentioned, a tiny bit of espresso powder can amplify the cocoa notes without adding coffee taste.
Temperature Problems (Center Not Molten): This means overbaking. Oven temperatures can be inaccurate. Use an oven thermometer. Start checking at 10 minutes. The centers should look underdone. Remember, they continue to cook in the hot tin. If the center is solid, you’ve baked them about 1-2 minutes too long. Next time, reduce the time.
Equipment Challenges (Batter Sticking): Always use liners. If the cupcakes still stick, try a different brand of liner or give them a very light spray with baking spray. For unmolding ramekin versions, ensure you grease and cocoa-dust them thoroughly. Let them rest for only 1 minute before inverting onto a plate.
Ingredient Substitutions (Center Leaked Out): If your filling seeped into the batter or out the bottom, the jam may have been too warm or runny. Chilling it is crucial. Also, ensure you fully enclose the jam dollop with batter, sealing it in the middle of the cupcake. A thicker, high-fruit content jam works best.
Recipe Success Stories
Community feedback on this Decadent Raspberry Chocolate Lava Cupcakes recipe consistently highlights the “wow factor.” Home bakers love the impressed reactions from family and friends when the molten center is revealed. Many report that the recipe has become their go-to for special occasions, replacing store-bought desserts. The clear instructions are frequently praised for making a seemingly complex technique very achievable, boosting confidence in the kitchen.
Variation successes are abundant. Readers have shared triumphs with different fillings: one used a homemade lemon curd for a bright twist, another swirled peanut butter into the jam. The adaptability of the base chocolate recipe is a major plus. Bakers have successfully made them for gluten-free guests using the suggested blends and report that the texture was still fantastic, which is not always the case with gluten-free baking.
Adaptation stories often involve scaling. A reader once doubled the recipe for a wedding shower of 50 people, baking them in batches throughout the morning. She reported that holding the batter in the fridge between batches worked perfectly. Another story involved a baker who only had a mini muffin tin and successfully created adorable, bite-sized lava cakes by reducing the bake time to 8 minutes, perfect for a cocktail party.
Reader suggestions have improved the recipe over time. One common tip is to use a melon baller or small teaspoon measure to create a neat, deep well for the jam. Another suggestion is to add a tiny piece of solid chocolate in the center with the jam for an even more intense chocolate lava. These community-driven tips enrich the baking experience for everyone.
Photography tips from successful bakers emphasize natural light. Shooting the moment a cupcake is broken open, with the lava flowing, always makes for a stunning image. Using a dark plate or rustic board provides contrast. A dusting of powdered sugar just before the photo makes the cupcakes look fresh and inviting. Many say this is one of the most photogenic desserts they’ve ever made.
Frequently Asked Questions
Q: Can I use milk chocolate
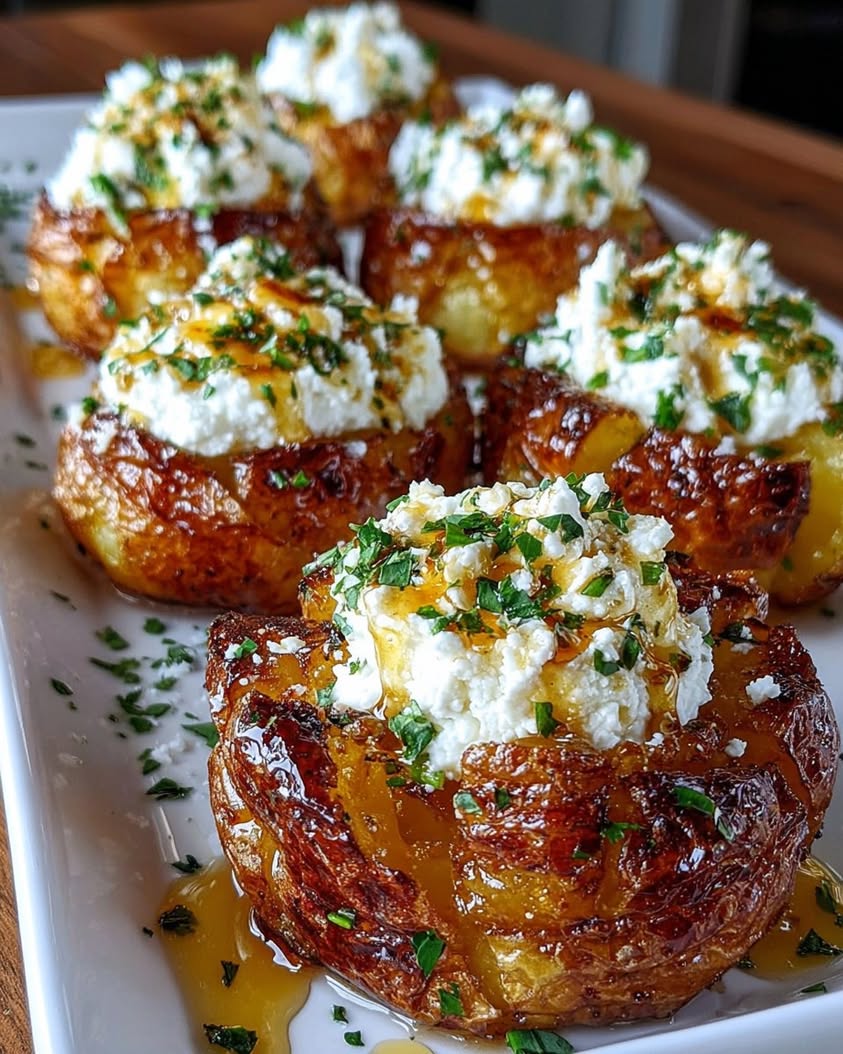
Print Decadent chocolate cupcakes with a gooey raspberry-filled molten center, perfect for a sweet treat. You can customize the seasonings to taste.Raspberry Chocolate Lava Cupcakes
Description
Ingredients
Instructions
Notes