Black Forest Cookie Dough Brownie Bombs: An Irresistible Dessert Mashup
Imagine the ultimate dessert mashup where your favorite childhood treats collide. The Black Forest Cookie Dough Brownie Bombs deliver exactly that experience, combining three beloved sweets into one stunning, bite-sized package. Essentially, these decadent bombs feature a rich, fudgy brownie center, a layer of edible cherry-studded cookie dough, and a luxurious chocolate shell. Ultimately, they offer a symphony of textures and flavors that will captivate any dessert lover.
Creating these show-stopping treats feels like a fun kitchen project with an incredibly rewarding payoff. The process involves baking a simple brownie, mixing a quick edible cookie dough, and mastering a simple chocolate coating technique. Meanwhile, the aroma of chocolate and cherries will fill your kitchen, building anticipation for the final product. Consequently, these bombs make a perfect project for a weekend baking session, promising impressive results for parties, gifts, or a special family treat.
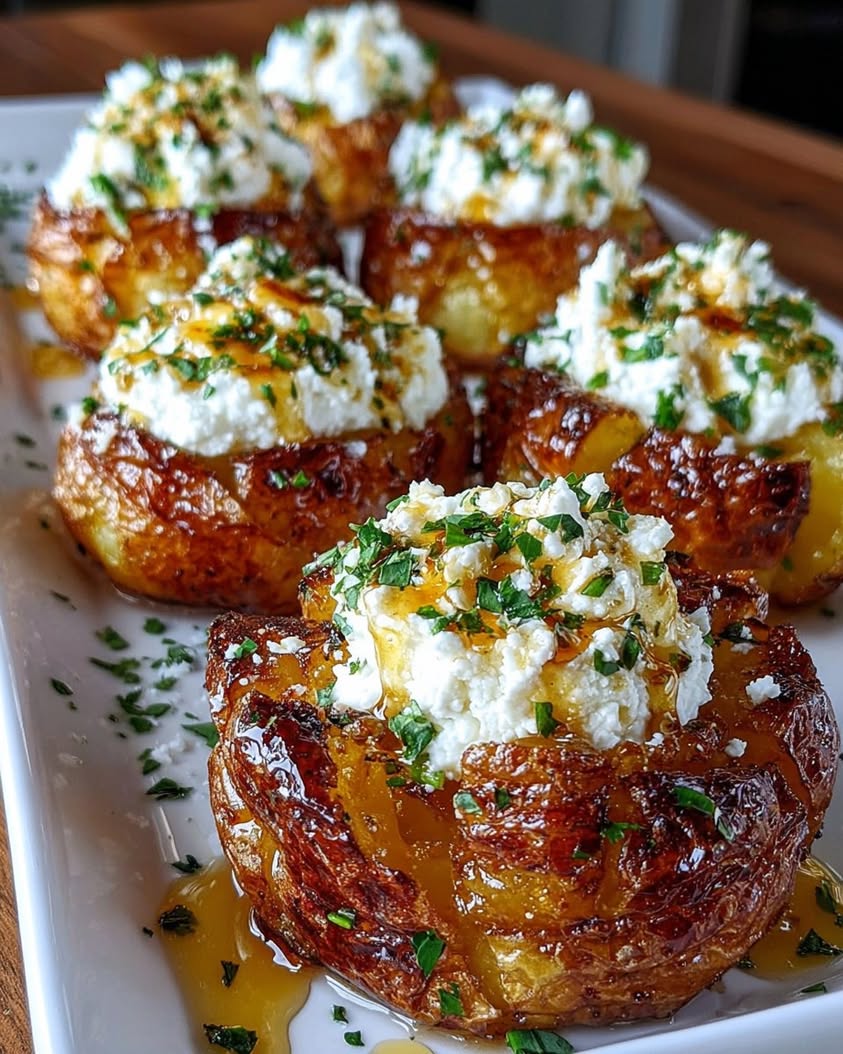
The visual appeal of these Black Forest Cookie Dough Brownie Bombs is undeniable. Each one resembles a professional truffle but boasts far more exciting layers inside. Picture a glossy, dark chocolate exterior giving way to a soft, cherry-flecked dough and finally, that dense, moist brownie core. They are as beautiful on a dessert platter as they are delicious, guaranteeing they will be the star of any gathering.
Quick Recipe Highlights
- Flavor Profile: These bombs deliver a powerful trio of deep, dark chocolate, sweet and tangy cherries, and a buttery, vanilla-kissed cookie dough. The flavor is intensely chocolatey upfront, followed by the bright pop of cherry and the nostalgic taste of raw cookie dough.
- Texture: Experience a fantastic textural journey from the crisp snap of the chocolate shell to the soft, almost creamy edible dough, and finally the dense, fudgy crumb of the brownie center. It’s a satisfying contrast in every single bite.
- Aroma: The key aromatic notes are rich, warm cocoa and sweet, fruity cherries. As you coat them in chocolate, the scent of melting chocolate adds a final, irresistible layer to the baking experience.
- Visual Appeal: These bombs boast a professional, glossy chocolate finish that makes them look store-bought. The contrast between the dark shell and the occasional glimpse of a red cherry piece inside creates stunning visual interest on any plate.
- Skill Level Needed: This recipe requires basic baking skills like making brownies from a mix or scratch and melting chocolate. The assembly is straightforward but requires a bit of patience for rolling and dipping. It’s a great next-step project for confident beginners.
- Special Equipment: You will need a standard muffin tin or baking pan for the brownies, a microwave or double boiler for melting chocolate, and parchment paper for easy cleanup. A small cookie scoop helps portion the dough uniformly.
Recipe Overview
- Difficulty Level: We rate this recipe as intermediate due to the multi-step assembly process. While each component is simple, the technique of layering, chilling, and coating requires attention to detail and timing. However, clear instructions make the process very manageable for any home baker willing to follow the steps.
- Category: This recipe falls squarely into the dessert category, specifically under confections and no-bake treats (aside from the brownie base). They are perfect for parties, potlucks, holiday gift boxes, or as a special homemade candy.
- Cuisine: The inspiration is a fusion of American dessert culture, combining the German-inspired Black Forest gateau flavors (chocolate and cherry) with the all-American love for edible cookie dough and brownies. It’s a modern, inventive treat without strict traditional boundaries.
- Cost: The cost is moderate, primarily driven by quality chocolate and real cherry ingredients. Using a brownie mix can lower cost and effort. Overall, making these at home is significantly more affordable than purchasing similar artisan chocolates, and you yield a dozen impressive treats.
- Season: These bombs are fantastic year-round but feel especially fitting for the holiday season due to their festive appearance. They also shine in summer when fresh cherries are abundant, allowing for a fresh twist on the recipe.
- Occasion: They are ideal for celebratory occasions like birthdays, Valentine’s Day, Christmas parties, or as a thoughtful homemade gift. Furthermore, they make a spectacular finale to a dinner party or a fun activity for a baking date.
Why You’ll Love This Recipe
First and foremost, the taste and texture appeal is off the charts. These Black Forest Cookie Dough Brownie Bombs are a true indulgence, satisfying multiple dessert cravings at once. You get the intense chocolate satisfaction of a brownie, the nostalgic, buttery flavor of eating cookie dough straight from the bowl, and the classic fruit-chocolate pairing of Black Forest cake. Every bite is a complex and delightful surprise that feels both familiar and excitingly new.
From a convenience standpoint, this recipe offers fantastic preparation benefits. You can break the work into stages, baking the brownies one day and assembling the next. Moreover, the components are simple and forgiving. The edible cookie dough requires no baking and comes together in minutes, while the brownie base can even be made from a reliable box mix to save time. Consequently, you can create a gourmet-looking dessert without professional pastry skills.
While these are an indulgent treat, you control the ingredients, which is a significant advantage. You can choose a high-quality dark chocolate for coating, which contains antioxidants. Additionally, you can opt for natural, juice-sweetened dried cherries without artificial additives. By making them at home, you avoid the preservatives and excessive sugars often found in store-bought confections, allowing for a slightly more mindful indulgence.
The social and entertaining value of these bombs is immense. They are absolute showstoppers on a dessert table. Guests will be amazed that you made them yourself, and they spark conversation. They are perfectly portioned, mess-free finger food for parties, and packaging them in a cute box instantly creates a heartfelt, impressive gift for teachers, neighbors, or friends.
Finally, these Black Forest Cookie Dough Brownie Bombs are cost-effective and accessible. Creating a dozen luxurious truffle-like desserts at home costs a fraction of what you’d pay at a chocolatier. The ingredients are common and easy to find at any grocery store. This recipe democratizes a fancy dessert, making it achievable and fun for any home cook looking to impress.
Historical Background and Cultural Significance
The origin story of this recipe is a modern tale of dessert fusion. It doesn’t have centuries of history but instead represents the contemporary trend of “mashup” desserts, where bakers combine iconic treats into something new. The Black Forest aspect pays homage to the German Schwarzwälder Kirschtorte (Black Forest Gateau), which originated in the Black Forest region. That cake traditionally layers chocolate sponge, whipped cream, and sour cherries with Kirschwasser (cherry brandy). This recipe captures its spirit in a portable, playful form.
The cultural importance lies in its reflection of current food trends. Modern dessert culture, especially in North America, celebrates indulgence, nostalgia, and shareable, visually striking treats. The inclusion of edible cookie dough taps directly into a widespread nostalgic love, while the brownie is arguably America’s most beloved baked good. Combining them with a classic European flavor profile creates a cross-cultural treat that feels both innovative and comfortingly familiar.
The evolution of the recipe follows the path of the “cake pop” and “truffle” trend. Bakers began enrobing pieces of cake and other desserts in chocolate to create neat, pop-able treats. This recipe takes that concept further by introducing a middle layer of cookie dough, adding complexity and texture. It’s a natural progression in the world of dessert bombs and stuffed confections, where the goal is to pack as much flavor and surprise into a single bite as possible.
Regional variations could easily branch off from this core concept. For instance, in the South, you might add pecans and a bourbon-soaked cherry. A tropical variation could use coconut in the dough and a dried pineapple-mango mix. The basic formula—brownie center, flavored dough layer, chocolate shell—is a versatile template. This adaptability ensures the Black Forest Cookie Dough Brownie Bombs can inspire endless personalization based on local tastes and ingredient availability.
Ingredient Deep Dive
Brownie Base: The brownie forms the rich, fudgy heart of the bomb. Culturally, brownies are an American baking icon, first appearing in cookbooks in the early 20th century. For the best texture, aim for a dense, moist recipe or mix, not a cakey one. You can bake a batch from scratch or use a high-quality boxed mix for convenience. For a deeper flavor, consider adding a teaspoon of instant espresso powder to the batter. Store leftover baked and cooled brownies wrapped tightly at room temperature for 2 days or freeze for up to 3 months.
Dried Cherries: These provide the essential “Black Forest” tang and chewy texture. Traditionally, the gateau uses sour Morello cherries. Look for tart or sweet-tart dried cherries without added sugar if possible. Cherries are rich in antioxidants like anthocyanins, which have anti-inflammatory properties. If you can’t find dried cherries, a substitute is dried cranberries, though the flavor will differ. For an authentic touch, you can plump the dried cherries in a tablespoon of Kirsch or cherry juice before chopping and adding them to the dough.
Edible Cookie Dough: This component uses heat-treated flour and no eggs to make it safe for consumption. The technique of toasting flour kills any potential bacteria. The dough’s base is simple: butter, sugar, vanilla, flour, and milk. The key is achieving a pliable, rollable consistency. Use room-temperature butter for easy creaming and add milk a teaspoon at a time to reach the perfect texture. For food safety, ensure you heat-treat the flour by microwaving it in 30-second intervals until it reaches 165°F, or bake it on a sheet at 350°F for 5 minutes.
Chocolate for Coating: The quality of your coating chocolate makes a dramatic difference. Use chocolate specifically labeled for dipping or “couverture,” as it contains more cocoa butter and melts to a thinner, smoother consistency that sets with a snap. You can use dark, milk, or semi-sweet based on your preference. Dark chocolate complements the sweetness best. Always melt chocolate slowly using a double boiler or in short bursts in the microwave, stirring frequently to prevent seizing. Properly tempered chocolate will give your bombs a professional, glossy finish.
Common Mistakes to Avoid
- Using Hot Brownies: Attempting to crumble warm brownies will create a gummy, mushy paste. You must let the brownies cool completely to room temperature, or even chill them, so they crumble into fine, dry crumbs that bind properly.
- Undermelting or Overheating Chocolate: Chocolate that isn’t fully melted will be lumpy and impossible to coat smoothly. Conversely, overheating chocolate (especially in the microwave) will cause it to seize into a grainy, solid mass. Melt it gently and stir often.
- Cookie Dough Too Sticky or Dry: If your dough is too sticky, you added too much liquid; add a bit more heat-treated flour. If it’s too dry and crumbly, add milk one teaspoon at a time until it holds together when pinched. The right consistency is crucial for rolling.
- Not Chilling Between Steps: Skipping the chilling steps is a recipe for messy failure. The brownie balls must be firm before applying the dough layer, and the dough-wrapped bombs must be very cold before dipping. Otherwise, they will fall apart in the warm chocolate.
- Using Untreated Flour: Never use raw all-purpose flour straight from the bag in edible cookie dough. Raw flour can carry harmful bacteria like E. coli. Always heat-treat your flour before using it in any no-bake recipe meant for consumption.
- Overcrowding the Dipping Station: When dipping, work with one cold bomb at a time. Taking multiple out of the fridge will cause them to warm up and soften, making them difficult to handle and more likely to lose their shape in the chocolate.
- Forgetting to Tap Off Excess Chocolate: After dipping, gently tap the fork or dipping tool on the side of the bowl to remove excess chocolate. This prevents a large, messy “foot” from forming on the bottom of your bomb and creates a cleaner, more professional look.
- Storing in a Warm Place: After coating, the bombs need to set in a cool place. Storing them somewhere warm or in direct sunlight will cause the chocolate shell to soften, lose its snap, and potentially become sticky.
Essential Techniques
Heat-Treating Flour: This technique is non-negotiable for food safety in edible dough. Spread the flour evenly on a microwave-safe plate or baking sheet. Microwave in 30-second intervals, stirring between each, until the flour’s temperature reaches 165°F on a food thermometer. Alternatively, bake it at 350°F for 5 minutes. This process eliminates potential pathogens. Let the flour cool completely before using it in your dough to prevent it from melting the butter. The visual cue for success is that the flour will feel slightly hot to the touch but will not have changed color.
Creating the Layered Center: The technique involves compacting the brownie crumbs into a small, dense ball, then evenly wrapping a flat disc of cookie dough around it. First, ensure your brownie crumbs are fine. Use a tablespoon measure or small scoop for consistent sizing. Roll the crumbs firmly between your palms to create a tight ball. For the dough, flatten a portion into a thin, even disc in your hand. Place the brownie ball in the center and gently wrap the dough around, pinching seams to seal. The goal is a uniform layer without any brownie peeking through.
Dipping in Chocolate: Proper dipping ensures a smooth, even, professional-looking shell. Use a fork or a specialty dipping tool. Spear a well-chilled bomb on the fork. Submerge it completely in the melted chocolate. Lift it out and gently tap the fork on the bowl’s edge to drain excess chocolate. Slide the bomb onto a parchment-lined tray by pushing it off the fork with a toothpick or a second fork. If the chocolate thickens as it cools, re-warm it briefly. The visual cue for a good dip is a smooth, glossy surface that sets firm without streaks.
Pro Tips for Perfect Black Forest Cookie Dough Brownie Bombs
Use a small cookie scoop for both the brownie mixture and the cookie dough to ensure every bomb is uniformly sized. This guarantees even chilling and coating times, plus a professional, consistent appearance.
Keep a bowl of ice water nearby when handling the cookie dough. If the dough gets too soft from the heat of your hands, quickly cool your fingers in the water and dry them to firm up the dough for easier shaping.
Add a teaspoon of refined coconut oil or vegetable shortening to your melting chocolate. This thins the chocolate slightly, making for a smoother coating and a more delicate shell that’s easier to bite through.
After dipping each bomb, immediately sprinkle with a tiny pinch of sea salt or a reserved chopped dried cherry before the chocolate sets. This adds visual flair and a burst of flavor that complements the sweetness.
If your chocolate coating develops streaks or “bloom” (a white, cloudy appearance), it’s likely due to slight temperature changes but is still perfectly safe to eat. For a perfect gloss, ensure your bombs are cold but your chocolate is fluid and not too hot.
Line your baking sheet with parchment paper or a silicone mat for setting the dipped bombs. Wax paper can sometimes stick to the setting chocolate, while parchment ensures a clean release every time.
Variations and Adaptations
For regional variations, consider a Rocky Road version by adding mini marshmallows and chopped almonds to the brownie base. A Salted Caramel Pretzel twist could involve a caramel center and crushed pretzels in the cookie dough. The basic method is wonderfully adaptable to local flavors and ingredients.
Seasonal adaptations are easy and fun. In fall, mix pumpkin pie spice into the cookie dough and use dried cranberries. For winter holidays, add peppermint extract to the dough and crush candy canes for topping. In spring, use dried blueberries and a white chocolate coating for a fresh twist.
Dietary modifications can make these bombs inclusive. For gluten-free, use a certified GF brownie mix and GF heat-treated flour. For dairy-free, use plant-based butter and milk, and ensure your chocolate is dairy-free. A vegan version would also require a flax-egg brownie and dairy-free chocolate.
Flavor variations can take you around the world. Try an Orange Creamsicle version with orange zest in the dough and a white chocolate coat. A Cookies and Cream bomb could use Oreo crumbs in the dough. For a tropical flair, use dried pineapple and coconut in the dough and dip in milk chocolate.
Texture modifications can add excitement. Roll the finished dough-wrapped ball in crushed freeze-dried raspberries before dipping for a tart, crunchy exterior. Or, after the chocolate sets, drizzle with a contrasting color of chocolate for a more elaborate finish.
Presentation alternatives include making them as bars. Press the brownie layer into a pan, spread the cookie dough over top, and pour melted chocolate over everything. Chill and cut into squares. This is a faster method for feeding a crowd with the same fantastic flavors.
Serving and Presentation Guide
Plating techniques can elevate these homemade treats. Arrange them in a single layer on a sleek, dark slate board or a vintage cake stand. Alternatively, place each bomb in a small, colorful paper candy cup, which makes them easy to pick up and adds a festive, professional touch. Grouping them in odd numbers (like 3 or 5) is visually appealing.
Garnishing ideas are simple but effective. A light dusting of edible gold or pearl luster dust over the set chocolate adds glamour. You can also top each with a single, perfect dried cherry or a piece of candied orange peel immediately after dipping. A final, delicate drizzle of white or pink chocolate creates beautiful contrast.
Traditional accompaniments for Black Forest flavors include lightly sweetened whipped cream or a dollop of cherry compote on the side. For a modern twist, serve with a small glass of cold milk, a shot of espresso, or a glass of dessert wine like a Ruby Port or a Cherry Lambic beer.
Modern serving suggestions include using them as a topping for a milkshake or ice cream sundae. Crush one over a bowl of vanilla ice cream for an incredible texture mix. They also make a stunning addition to a dessert charcuterie board alongside cheeses, fruits, and nuts.
Temperature considerations are key. Serve these bombs slightly chilled, straight from the refrigerator. The cool temperature ensures the chocolate shell has a satisfying snap and the interior remains firm. However, let them sit at room temperature for 5 minutes before serving to allow the full flavor profile to blossom.
Portion control is built-in, as each bomb is a rich, single-serving delight. For a large party, consider making them slightly smaller using a teaspoon measure. Always provide small plates or napkins, as the chocolate can melt slightly from finger heat, especially in a warm room.
Wine and Beverage Pairing
Wine pairings should complement the rich chocolate and bright cherry notes. A Brachetto d’Acqui, a lightly sparkling red Italian wine with berry flavors, is a delightful match. Alternatively, a late-harvest Zinfandel or a Port offers enough sweetness and body to stand up to the dessert’s intensity. The key is choosing a beverage that is as sweet as or sweeter than the dessert to avoid a bitter taste.
Non-alcoholic alternatives can be just as sophisticated. A glass of tart cherry juice or a black cherry sparkling water cleanses the palate. A rich, creamy cold brew coffee or an iced mocha highlights the chocolate notes. For a cozy option, a pot of cherry-infused herbal tea or a classic hot chocolate makes a perfect companion.
Coffee and tea pairings work wonderfully. A dark roast espresso cuts through the sweetness and complements the deep cocoa flavors. For tea, consider a smoky Lapsang Souchong for contrast or a sweet, floral Cherry Blossom tea to echo the fruit element. Serving a small cup alongside the bombs creates a complete dessert experience.
Temperature considerations for beverages depend on the season. In colder months, pair with the hot coffee or tea suggestions. For summer gatherings, iced coffee, cold milk, or sparkling cherry beverages are refreshing contrasts to the rich, chilled bombs. Always offer a variety to cater to different preferences.
Serving suggestions include presenting the bombs on a platter with small glasses of the suggested pairings arranged around them. For a dinner party, you can serve the bombs with a pre-poured dessert wine at each place setting. Labeling the pairings on a small card can also be a fun and informative touch for your guests.
Storage and Shelf Life
Storage methods are straightforward but important for maintaining quality. Store the completely set Black Forest Cookie Dough Brownie Bombs in a single layer in an airtight container. Place parchment paper between layers if you must stack them. The ideal storage location is the refrigerator, where the chocolate will remain firm and the interior fresh.
Temperature requirements are specific. These bombs must be kept cool, ideally between 34°F and 40°F (refrigerator temperature). Do not leave them at room temperature for extended periods, especially in warm climates, as the chocolate will soften and the dough can become too soft. For serving, a brief 5-10 minute rest on the counter is perfect.
Container recommendations include rigid, airtight plastic or glass containers with lids. Avoid soft plastic bags where the bombs can get crushed. For gifting, use decorative cardboard boxes with dividers or mini cupcake liners to keep them from touching and damaging their glossy finish during transport.
Signs of spoilage are rare if stored properly but watch for any off smells, significant changes in texture (like excessive oiliness or dryness), or the growth of mold, which is highly unlikely in the fridge. The primary concern is quality degradation, not safety, if consumed within the recommended timeframe.
Reheating instructions are generally not needed, as these are meant to be eaten cool. However, if the chocolate has softened, simply place the container back in the refrigerator for 30 minutes to re-firm the shell. Do not microwave them, as this will melt the chocolate and create a mess.
Freezing guidelines allow for long-term storage. Place the set bombs on a parchment-lined baking sheet and freeze until solid (about 2 hours). Then transfer them to a heavy-duty freezer bag or airtight container. They will keep for up to 2 months. Thaw overnight in the refrigerator before serving.
Make Ahead Strategies
Prep timeline is very flexible. You can bake the brownies up to 2 days in advance, storing them covered at room temperature. The edible cookie dough can be made 1-2 days ahead and kept tightly wrapped in the refrigerator. The full assembly and dipping can be done the day before your event. This staged approach makes the process feel much less daunting.
Storage between steps is simple. Cooled brownie crumbs can be stored in an airtight container. Prepared cookie dough should be wrapped tightly in plastic wrap. Once you form the layered balls (brownie center wrapped in dough), you can arrange them on a parchment-lined tray, cover with plastic, and refrigerate for up to 24 hours before the final chocolate coating.
Quality impact assessment shows that making components ahead has minimal negative effect and can even improve the final product. Chilling the brownie balls and dough-wrapped bombs thoroughly actually makes them easier to dip and results in a cleaner finish. The flavors also have time to meld together slightly.
Assembly tips for a make-ahead schedule: Complete all steps up to dipping. Keep the uncoated bombs chilled on their tray. Melt the chocolate and perform the dipping on the day you plan to serve or gift them. This ensures the chocolate shell is at its freshest, with the best gloss and snap.
Reheating guidelines don’t apply to the components, but you may need to let the refrigerated cookie dough soften slightly at room temperature for 10 minutes before using it if it was made far in advance. This makes it easier to roll and flatten for wrapping.
Fresh element additions, if any, should be done at the last minute. For example, if you are garnishing with a fresh cherry on top, add it just before serving to prevent it from bleeding moisture onto the chocolate. Any delicate toppings like crushed cookies or nuts are best added right after dipping.
Scaling Instructions
Halving the recipe is simple for a smaller batch. Precisely divide all ingredient quantities in half. Use an 8×8 pan for the brownies or bake half the batter in a loaf pan, adjusting the bake time slightly. The assembly process remains the same; you will just have fewer bombs to coat. This is perfect for a small household or testing the recipe first.
Doubling or tripling the recipe is excellent for events or gift-giving. Use a 9×13 pan for the brownie base. Mix the cookie dough in two separate batches to avoid overworking your mixer and to ensure even mixing. Set up a dedicated assembly line with all your stations (crumbling, rolling, wrapping, dipping) to streamline the process. Allow extra chilling time, as a larger quantity of bombs in the fridge may take longer to firm up.
Equipment adjustments for scaling up are minimal. You will need more baking sheets for chilling and setting the dipped bombs. Ensure you have a large enough bowl for melting a double batch of chocolate, or melt it in separate batches. Having multiple forks or dipping tools can speed up the coating process significantly.
Timing modifications are important when scaling. While prep time increases linearly, chilling time may need a slight extension. When dipping a large batch, your chocolate may cool and thicken; be prepared to gently re-warm it to maintain a fluid consistency. Plan for the entire process to take proportionally longer, especially the hands-on assembly phase.
Storage considerations for large batches are crucial. You will need multiple airtight containers or a very large one. Ensure you have enough space in your refrigerator to store the trays during chilling and the final containers. For gifting, prepare your boxes or bags in advance to streamline packaging once the bombs are set.
Nutritional Deep Dive
Macro breakdown for one bomb is indicative of a rich dessert. Expect a balance of carbohydrates from the sugars and flour, a moderate amount of fat from the butter, chocolate, and any oils, and a small amount of protein from the flour and eggs in the brownie. The exact values depend on your specific ingredient choices, such as using dark versus milk chocolate.
Micronutrient analysis reveals some benefits amidst the indulgence. Dark chocolate provides iron, magnesium, and antioxidants like flavonoids. Cherries offer vitamin C, potassium, and anti-inflammatory compounds. Using whole wheat flour in the brownie or dough can add fiber. However, these are treat foods, so their primary nutritional contribution is enjoyment and satisfaction.
Health benefits are linked to the quality of ingredients chosen. Opting for dark chocolate with a high cocoa percentage maximizes antioxidant intake. Selecting dried fruit without added sulfites or sugars is a cleaner choice. The act of baking and creating food mindfully also has psychological benefits, reducing stress and fostering creativity.
Dietary considerations are important for those with restrictions. This standard recipe contains gluten, dairy, eggs, and potentially nuts. Always check labels on chocolate and dried fruit for allergen warnings. The variations section provides guidance on modifying the recipe for common dietary needs like gluten-free or vegan.
Portion analysis is built into the recipe, as each bomb is a single, rich serving. This inherent portion control can help prevent overindulgence compared to cutting a slice from a large cake or pan of brownies. Savoring one bomb slowly allows you to fully appreciate the complex flavors and textures.
Weight management tips involve mindful consumption. Enjoy one bomb as a planned treat, not an everyday snack. Pair it with a protein-rich meal earlier in the day to help manage blood sugar spikes. Most importantly, focus on the experience of making and sharing the dessert, not just the consumption, to cultivate a healthy relationship with indulgent foods.
Dietary Adaptations
For a gluten-free version, use a certified gluten-free brownie mix or your favorite GF brownie recipe. Ensure your oats (if used) are certified GF. For the edible dough, use a 1:1 gluten-free all-purpose flour blend and heat-treat it following the same method. Always verify that all other ingredients, like chocolate and dried fruit, are processed in a GF facility.
A dairy-free adaptation requires plant-based swaps. Use vegan butter sticks and a non-dairy milk (like almond or oat) in the cookie dough. For the brownie base, use a dairy-free recipe or mix. The chocolate coating must be a high-quality dairy-free dark or semi-sweet chocolate. Check labels carefully, as some chocolates contain milk solids even if dark.
Creating a vegan version combines the dairy-free changes with an egg-free brownie. Use a flax egg (1 tbsp ground flax + 3 tbsp water per egg) or commercial egg replacer in the brownies. Ensure your sugar is vegan (some refined white sugar uses bone char). The cookie dough will already be egg-free. The result is a fully plant-based indulgence that everyone can enjoy.
For a lower-carb or keto adaptation, significant recipe changes are needed. The brownie base would use almond flour, cocoa powder, and a keto sweetener. The “cookie dough” could be made from almond flour, keto sweetener, and nut butter. The coating would require sugar-free chocolate. This is a complete re-imagining of the recipe but can capture the spirit of the flavor combination.
A Paleo version would avoid grains, dairy, and refined sugars. Use almond or coconut flour in the brownie and dough, sweeten with coconut sugar or maple syrup, and use ghee or coconut oil instead of butter. Coat with a Paleo-friendly dark chocolate. This adaptation focuses on whole-food ingredients while still delivering a decadent treat.
Troubleshooting Guide
If your bombs have a grainy texture, the issue likely stems from the chocolate seizing or the brownie crumbs not being fine enough. For chocolate, seize can happen if a tiny drop of water gets in during melting. Sadly, seized chocolate is difficult to salvage. For brownies, pulse cooled brownie pieces in a food processor for superfine crumbs, or press them through a mesh strainer.
If the flavor balance is too sweet, you can counteract it. Use a darker, more bitter chocolate for coating (70% or higher). Ensure your dried cherries are tart, not sweetened. You can also add a pinch of salt to the cookie dough or a light sprinkle of flaky sea salt on top of the dipped chocolate to cut the sweetness and enhance other flavors.
Temperature problems often manifest as melting or cracking. If bombs melt during dipping, they are not cold enough; refreeze for 15 minutes. If the chocolate coating cracks when you bite into it, the bombs were too cold when dipped, or the chocolate was too thick. Let bombs temper at room temp for 2-3 minutes before dipping, and thin chocolate with a bit of oil.
Equipment challenges usually involve melting chocolate. If you don’t have a double boiler, create one by placing a heatproof bowl over a pot of simmering water, ensuring the bowl doesn’t touch the water. For rolling, if dough sticks to your hands excessively, wear disposable food-safe gloves or lightly oil your palms.
Ingredient substitutions can sometimes alter consistency. If you substitute a different dried fruit, chop it to a similar size as cherries. If using a nut butter in a dietary adaptation, note that it will make the dough oilier; you may need to adjust the flour slightly. Always make a test bomb when using significant substitutions to check the texture before committing to the full batch.
Timing concerns often involve the chocolate setting too fast. Work in a cool room and coat only 3-4 bombs at a time, keeping the rest in the fridge. If chocolate in the bowl starts to thicken and set, gently re-warm it for 10-15 seconds in the microwave, stirring thoroughly before continuing.
Recipe Success Stories
Community feedback on this recipe has been overwhelmingly positive. Many home bakers report that these bombs were the hit of their holiday cookie exchange, often requested year after year. Parents love making them with older children, finding the assembly process fun and engaging. The most common compliment is that they look far more difficult to make than they actually are, giving the baker a great sense of accomplishment.
Variation successes from readers are inspiring. One baker created a “Christmas in July” version using dried cranberries and orange zest, dipping them in white chocolate and sprinkling with green sanding sugar. Another successfully made a gluten-free, dairy-free batch for a friend’s birthday, reporting that no one could tell they were allergen-friendly. These stories highlight the recipe’s fantastic adaptability.
Adaptation stories often focus on gifting. Readers have shared how they package these in clear cellophane bags with ribbon for teacher gifts, or place them in decorative tins for neighbors. One story involved a baker who made a double batch for a bake sale, and they sold out within the first hour, raising significant funds. The recipe’s impressive appearance makes it perfect for such occasions.
Reader suggestions have improved the recipe over time. A common tip is to add a tiny bit of almond extract to the cookie dough to enhance the cherry flavor. Another popular suggestion is to insert a whole, pitted brandied cherry into the center of the brownie ball for an extra burst of flavor. The community of bakers continually finds Print
Black Forest Cookie Dough Brownie Bombs
- Total Time: 45 minutes
- Yield: 4
Description
Decadent brownie balls filled with cherry and cookie dough, coated in chocolate and topped with cookie crumbs for a rich, indulgent treat.
Ingredients
- 1 box fudge brownie mix (plus required eggs and oil)
- 1 cup cherry pie filling, drained and chopped
- 1 cup edible cookie dough
- 2 cups semi-sweet chocolate chips
- 1 tablespoon coconut oil
- 1/2 cup chocolate cookie crumbs
- Maraschino cherries for garnish (optional)
Instructions
- Prepare brownie mix according to package directions and bake in a 9×13 pan. Let cool completely, then crumble into a large bowl.
- Mix crumbled brownies with chopped cherry pie filling until combined. Roll into 1.5-inch balls and place on a parchment-lined tray. Freeze for 30 minutes.
- Flatten small pieces of cookie dough and wrap around each brownie ball to fully enclose. Return to freezer for 15 minutes.
- Melt chocolate chips with coconut oil in a microwave-safe bowl, stirring until smooth. Dip each ball into chocolate, coating evenly, then roll in cookie crumbs. Place back on tray and top with a cherry if desired. Let set before serving.
Notes
You can customize the seasonings to taste.
- Prep Time: 15 minutes
- Cook Time: 30 minutes
- Method: Dessert
- Cuisine: American