Grandma’s Creamy Crème Brûlée Recipe: A Cozy, Unforgettable Dessert
My grandmother always believed the best desserts should feel creamy, cozy, and a little unforgettable. Therefore, her creamy crème brûlée recipe became the crown jewel of every family gathering. This creamy crème brûlée recipe delivers a silky custard beneath a crisp caramel shell. Consequently, every spoonful brings warmth and nostalgia to your table.
You will love how this creamy crème brûlée recipe balances simplicity with elegance. The vanilla custard remains smooth and rich, while the torched sugar topping adds a satisfying crack. Furthermore, the aroma of fresh vanilla fills your kitchen with pure comfort. This dessert works beautifully for holidays, anniversaries, or quiet weeknights at home.
Many people assume crème brûlée belongs only to fancy restaurants. However, this creamy crème brûlée recipe proves that home cooks can master it easily. With a few simple techniques, you can create a dessert that rivals any pastry chef. Additionally, the ingredients stay affordable and easy to find at any grocery store. Grandma knew that great desserts come from patience, good cream, and a little love.
Quick Recipe Highlights
- Flavor Profile: This creamy crème brûlée recipe offers a rich vanilla custard with deep caramel notes. The burnt sugar topping adds a subtle bitterness that balances the sweetness. Together, these layers create a sophisticated yet comforting taste.
- Texture: The custard melts on your tongue like velvet, while the caramelized top shatters with a crisp snap. This contrast between creamy and crunchy defines the classic crème brûlée experience. Each spoonful delivers both smoothness and crackle in perfect harmony.
- Aroma: Fresh vanilla bean or pure extract fills the air with warm, floral sweetness. As the sugar torches, it releases a toasted caramel scent that invites everyone to the table. These aromas together create an irresistible sense of comfort.
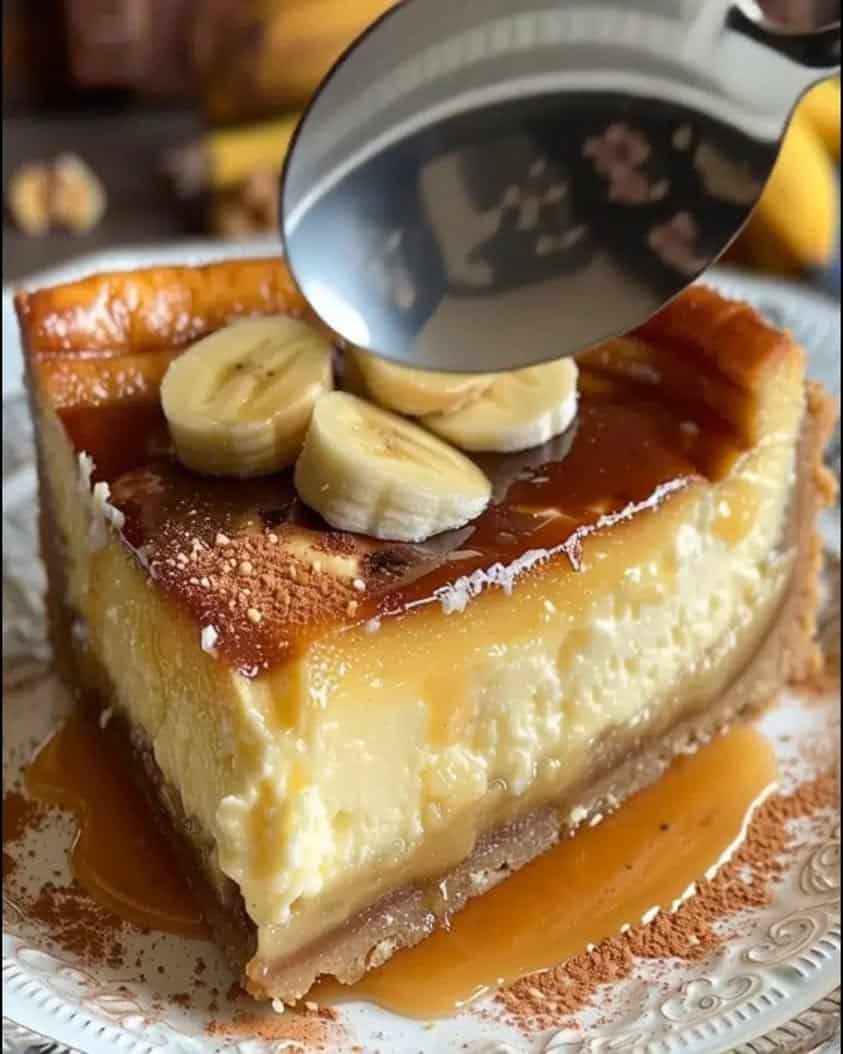
- Visual Appeal: The pale golden custard contrasts beautifully with the glossy amber sugar crust. When you tap the surface with a spoon, the crack reveals the creamy center beneath. This simple yet elegant presentation impresses without any elaborate decoration.
- Skill Level Needed: You need basic baking skills and comfort with a whisk and oven. The water bath technique requires some care, but it is easy to learn. Patience with chilling matters more than advanced culinary training.
- Special Equipment: You will need six ramekins, a roasting pan, and a kitchen torch. A fine mesh strainer helps achieve the silkiest custard texture. If you lack a torch, your oven broiler works as a backup.
Recipe Overview
- Difficulty Level: This creamy crème brûlée recipe rates as intermediate because of the water bath and tempering steps. However, each technique is straightforward once you understand the purpose. The custard requires gentle, even heat to avoid curdling. With attention and patience, even beginner bakers can succeed.
- Category: This dessert falls under custards, baked puddings, and French classics. You can serve it as a finale to any dinner or as a standalone treat. It also works as a stunning contribution to potlucks and dinner parties.
- Cuisine: Crème brûlée originates from French culinary tradition and dates back centuries. French cooks perfected the art of baking custard in gentle water baths. Over time, the dessert traveled across Europe and eventually to America. Today, it remains a symbol of French elegance and indulgence.
- Cost: This creamy crème brûlée recipe uses affordable pantry staples like cream, eggs, sugar, and vanilla. A batch for six people typically costs between eight and twelve dollars. Therefore, it delivers restaurant quality at a fraction of the price.
- Season: You can enjoy this dessert year round, but it shines in cooler months. The cozy, warm flavors suit fall and winter gatherings beautifully. In summer, top it with fresh berries for a lighter feel.
- Occasion: This dessert fits romantic dinners, holiday celebrations, and birthday parties. It also makes a lovely ending to Sunday family meals. Because it looks impressive, guests often assume you spent hours in the kitchen.
Why You’ll Love This Recipe
The taste and texture of this creamy crème brûlée recipe simply cannot be matched by most home desserts. The custard carries a pure vanilla flavor that feels both luxurious and familiar. Meanwhile, the caramelized sugar shell adds crunch and a hint of smokiness. Every bite delivers a perfect balance of sweet, creamy, and crisp elements. Consequently, your guests will remember this dessert long after the plates are cleared.
Preparation convenience makes this recipe a favorite among busy home cooks. You need only five main ingredients, most of which already sit in your kitchen. The oven does most of the work while you relax or prepare the rest of your meal. Furthermore, you can make the custards a day ahead and torch the sugar right before serving. This flexibility removes stress from entertaining.
Nutritionally, this creamy crème brûlée recipe offers a satisfying treat without unnecessary additives. Heavy cream provides richness, and egg yolks deliver protein and essential vitamins. Because you control the sugar, you can adjust sweetness to your preference. Additionally, the recipe contains no preservatives or artificial flavors. Therefore, you enjoy a cleaner indulgence compared to store bought desserts.
Social and entertaining value sets this dessert apart from ordinary sweets. Serving crème brûlée creates a moment of theater at the table. Guests love watching the torch caramelize the sugar and hearing the crack of the spoon. This interactive element sparks conversation and laughter. As a result, your dinner party ends on a memorable high note.
Cost effectiveness and accessibility make this creamy crème brûlée recipe practical for everyone. The ingredients stay inexpensive and available at any supermarket. You do not need specialty pastry skills or expensive equipment. Moreover, the recipe scales easily for small or large groups. Therefore, you can enjoy a luxury dessert without straining your budget.
Historical Background and Cultural Significance
The origin story of crème brûlée stirs friendly debate among food historians. France, England, and Spain each claim some version of the dessert. The French name translates to burnt cream, which describes the torched sugar top. Meanwhile, England boasts a similar recipe called Trinity Cream from Cambridge University. Regardless of its birthplace, the dessert evolved into a beloved international classic.
Cultural importance surrounds this dessert because it represents French patisserie at its finest. Chefs across generations have refined the custard technique to achieve perfect silkiness. In France, crème brûlée appears on menus from humble bistros to Michelin starred restaurants. This creamy crème brûlée recipe brings that same cultural prestige into your home kitchen. Consequently, you participate in a centuries old culinary tradition.
The evolution of the recipe reflects changes in kitchen technology and tastes. Early versions used open fires and iron tools to caramelize the sugar. Later, inventors created the modern kitchen torch, which made the process fast and precise. Home ovens with water baths also made custard baking more reliable. Today, this creamy crème brûlée recipe benefits from all these advancements.
Regional variations add delightful diversity to the classic dessert. In Spain, crema catalana uses citrus and cinnamon for a brighter flavor. In Japan, chefs often add matcha or black sesame for local twists. Some American versions incorporate bourbon or maple for a southern touch. Each variation honors the original while celebrating local ingredients.
Ingredient Deep Dive
Heavy cream forms the heart of this creamy crème brûlée recipe. Historically, cream symbolized wealth because it required surplus milk and careful preservation. Nutritionally, heavy cream provides fat soluble vitamins like A, D, and E. When selecting cream, choose a fresh carton with at least thirty six percent fat. Store it in the coldest part of your refrigerator and use it within a week. For substitutions, half and half works but produces a thinner custard.
Egg yolks contribute richness and the custard’s signature velvety texture. Cultures worldwide prize yolks for their emulsifying power in desserts and sauces. They deliver protein, choline, and important antioxidants like lutein. Choose fresh, large eggs with clean, uncracked shells for the best results. Keep eggs refrigerated and use them within three to five weeks. If needed, you can substitute two whole eggs for four yolks, though the texture changes slightly.
Granulated sugar sweetens the custard and creates the iconic caramel crust. Historically, sugar was a luxury spice before becoming an everyday staple. It provides quick energy but offers few nutrients, so moderation matters. For the custard, fine sugar dissolves fastest and prevents graininess. Store sugar in an airtight container away from moisture. Turbinado or raw sugar works beautifully for the topping because its coarse crystals caramelize evenly.
Vanilla extract or vanilla bean infuses warmth and depth into this creamy crème brûlée recipe. Vanilla originated in Mexico and became a prized global commodity. It contains antioxidants and adds aroma without calories. When buying extract, choose pure over imitation for the best flavor. Keep vanilla in a cool, dark cabinet and it will last for years. Alternatively, you can use almond extract or citrus zest for a different twist.
Salt might seem minor, but it sharpens every flavor in the custard. Throughout history, salt has preserved food and enhanced natural tastes. It provides trace minerals and helps balance sweetness. Use fine sea salt or kosher salt for even distribution. Store salt in a dry place to prevent clumping. If you follow a low sodium diet, simply reduce the amount or omit it.
Common Mistakes to Avoid
- Overwhisking the eggs introduces too much air, which creates bubbles and a foamy texture. Instead, whisk gently until the yolks just combine. This keeps the custard dense and silky.
- Skipping the tempering step causes the eggs to scramble when hot cream hits them. Always pour the warm cream slowly while whisking constantly. This gradual process raises the egg temperature safely.
- Baking without a water bath leads to uneven heat and rubbery custard. The water bath surrounds the ramekins with gentle, moist warmth. Therefore, always place ramekins in a roasting pan with hot water.
- Overbaking ruins the texture and causes curdling or cracks. The custard should jiggle slightly in the center when you nudge the pan. Remember that residual heat continues cooking after removal.
- Using the wrong sugar for the topping prevents proper caramelization. Coarse sugar like turbinado melts evenly and creates a crisp shell. Fine sugar burns too quickly under the torch.
- Torching too close to the custard warms the chilled dessert underneath. Hold the flame a few inches away and move it constantly. This technique melts the sugar without heating the custard.
- Chilling for too short a time leaves the custard soft and warm. At least four hours of refrigeration allows proper setting. Overnight chilling delivers the best results.
- Straining the custard seems optional but makes a huge difference. A fine mesh strainer removes any cooked egg bits or foam. Consequently, the final texture becomes perfectly smooth.
- Substituting low fat milk for cream changes the entire structure. The fat content in cream supports the custard’s rich, stable set. Low fat alternatives produce a watery, less satisfying dessert.
- Rushing the cooling process by placing hot ramekins in the fridge causes condensation and cracks. Let them cool on the counter first. Then refrigerate uncovered until fully chilled.
Essential Techniques
Tempering eggs ranks as the most important skill in this creamy crème brûlée recipe. This technique gradually raises the temperature of the yolks before combining them with hot cream. If you skip this step, the eggs cook instantly and turn lumpy. To master tempering, whisk the yolks with sugar first, then drizzle warm cream in a thin stream. Keep whisking constantly and watch for a smooth, pale yellow mixture. Visual cues include a glossy surface with no visible streaks of cooked egg.
The water bath, also called a bain marie, provides gentle, even heat during baking. This method surrounds the ramekins with hot water, which regulates the oven temperature around the custard. Without it, the edges cook faster than the center, causing cracks and curdling. To set up a water bath, place ramekins in a roasting pan and pour hot water halfway up their sides. Common pitfalls include using cold water, which extends baking time, or splashing water into the custard. The custard reaches doneness when the center wobbles like set gelatin.
Caramelizing the sugar topping requires a steady hand and a quality kitchen torch. This final step transforms plain sugar into a glassy, amber crust that defines crème brûlée. Hold the torch about two inches from the surface and move it in small circles. The sugar will bubble, darken, and harden within seconds. Watch for a deep golden color, because pale sugar tastes bland and black sugar tastes bitter. Common pitfalls include holding the flame too long in one spot or torching from too far away.
Pro Tips for Perfect Grandma’s Creamy Crème Brûlée Recipe
Use room temperature eggs and cream for a smoother custard. Cold ingredients take longer to blend and may create lumps. Let them sit on the counter for thirty minutes before starting. This small step improves texture significantly.
Strain the custard twice through a fine mesh sieve for ultimate silkiness. The first strain removes any cooked egg particles. The second catch ensures a flawless, restaurant quality surface. Your patience pays off in the final bite.
Add a pinch of salt to the sugar topping before torching. The salt enhances caramel flavor and balances sweetness. It also helps the sugar melt more evenly. This tiny addition makes a noticeable difference.
Chill the custards uncovered for the first hour to prevent condensation. Covering them warm traps moisture on the surface. After an hour, wrap them tightly with plastic film. This method keeps the top dry and ready for torching.
Torch the sugar just before serving for the best contrast. If you torch too early, the crust softens and loses its snap. The custard should stay cold while the sugar stays crisp. Timing this step creates the perfect temperature contrast.
Experiment with a thin layer of sugar for a delicate crack. A thick layer creates a heavier, chewier crust. Grandma preferred a moderate layer for balance. Adjust according to your personal preference.
Rotate the roasting pan halfway through baking for even heat. Ovens often have hot spots that cause uneven cooking. A simple rotation prevents one side from overcooking. Consequently, every custard bakes uniformly.
Use a thermometer to check the custard temperature for precision. The ideal internal temperature ranges from one hundred seventy to one hundred seventy five degrees. This reading guarantees a perfect set every time. Guessing becomes unnecessary when you use a thermometer.
Variations and Adaptations
Regional variations of this creamy crème brûlée recipe bring exciting new flavors to the classic. In Spain, crema catalana uses lemon zest and cinnamon instead of vanilla. In Italy, panna cotta shares a similar creamy texture but skips the baked custard step. In Mexico, chefs sometimes add a hint of coffee or chocolate. Each region adapts the dessert to local tastes and ingredients.
Seasonal adaptations let you enjoy this dessert all year long. In spring, infuse the custard with lavender or rose water for a floral note. During summer, top with fresh berries and mint for a bright finish. In autumn, add pumpkin puree and warm spices like nutmeg and clove. Winter calls for peppermint or orange zest to match the festive mood.
Dietary modifications allow more people to enjoy this creamy crème brûlée recipe. For a dairy free version, substitute full fat coconut cream for heavy cream. The texture remains creamy, though a slight coconut flavor appears. For a lower sugar option, use monk fruit sweetener in the custard. Remember that the sugar topping needs real sugar for proper caramelization.
Flavor variations expand the possibilities beyond vanilla. Try adding espresso powder for a mocha custard. Or swirl in melted dark chocolate for a decadent twist. Almond extract and toasted almonds create a lovely nutty profile. Citrus zest and Grand Marnier offer a sophisticated adult version.
Texture modifications suit different preferences and dietary needs. For a denser custard, add one extra yolk. For a lighter, airier texture, fold in whipped cream after baking and chilling. Some cooks prefer a softer set, which requires slightly less baking time. Adjust according to your taste and serving style.
Presentation alternatives let you customize the dessert for any event. Instead of individual ramekins, bake one large dish and scoop portions at the table. Serve in small glasses for a modern look. Add edible flowers or gold leaf for special celebrations. Each presentation style offers its own charm.
Serving and Presentation Guide
Plating techniques for this creamy crème brûlée recipe should highlight its elegant simplicity. Place the ramekin on a small dessert plate lined with a doily or folded napkin. Add a tiny spoon beside it for easy cracking. For a dramatic touch, serve on a slate board with a dusting of powdered sugar. Keep the presentation clean so the caramelized top remains the star.
Garnishing ideas range from classic to creative. A single fresh raspberry or a mint sprig adds a pop of color. Crumbled shortbread or biscotti offers textural contrast. For holidays, add a cinnamon stick or star anise. Drizzled caramel or chocolate sauce also makes a lovely finishing touch.
Traditional accompaniments include fresh berries, whipped cream, and shortbread cookies. In France, servers often present crème brûlée with a small glass of dessert wine. Coffee or espresso pairs beautifully with the rich custard. These classic pairings create a well rounded dessert experience.
Modern serving suggestions embrace creativity and personal style. Try a deconstructed version with broken custard pieces and caramel shards. Layer the custard with fruit compote in a glass for a parfait effect. Add a scoop of vanilla ice cream on the side for extra indulgence. These modern twists keep the dessert fresh and exciting.
Temperature considerations matter greatly for the perfect serving experience. The custard should stay cold and firm, while the sugar crust stays warm and crisp. Serve immediately after torching to preserve this contrast. If the custard warms too much, the texture becomes soft and less appealing.
Portion control tips help you serve elegant portions without waste. Standard ramekins hold about four to six ounces, which makes a perfect single serving. For lighter appetites, use smaller ramekins and reduce baking time slightly. Always let guests decide if they want a second helping. This approach keeps everyone satisfied.
Wine and Beverage Pairing
Wine pairings for this creamy crème brûlée recipe focus on sweetness and acidity. A sauternes or late harvest riesling complements the vanilla custard beautifully. Champagne or prosecco adds effervescence that cuts through the richness. For red wine lovers, a tawny port offers caramel notes that echo the topping. Each of these choices enhances the dessert without overpowering it.
Non-alcoholic alternatives include fresh espresso, cappuccino, or strong black tea. The bitterness of coffee balances the sweet custard perfectly. Chai tea adds warm spice notes that pair well with vanilla. Sparkling water with lemon cleanses the palate between bites.
Coffee and tea pairings deserve special attention for this dessert. A dark roast espresso cuts through the creaminess with bold intensity. Earl Grey tea offers bergamot notes that lift the vanilla flavor. Green tea provides a lighter option for those who prefer less caffeine. Experiment to find your favorite combination.
Temperature considerations for beverages matter as much as the dessert itself. Serve white wines and sparkling options well chilled. Red wines and ports should sit at cool room temperature. Hot coffee and tea should be freshly brewed and served immediately. The right temperature enhances both the drink and the dessert.
Serving suggestions include offering a small glass of dessert wine alongside the ramekin. Place the beverage to the right of the dessert plate for proper etiquette. For coffee, serve in a small cup with a saucer. These small details elevate the overall dining experience.
Storage and Shelf Life
Storage methods for this creamy crème brûlée recipe require care to preserve texture. Always store baked and cooled custards in the refrigerator. Wrap each ramekin tightly with plastic film to prevent moisture loss. Do not add the sugar topping until just before serving. This separation keeps the custard creamy and the topping crisp.
Temperature requirements for safe storage range from thirty four to forty degrees Fahrenheit. Keep the custards on a middle shelf rather than the door, where temperatures fluctuate. A consistent cold environment prevents bacterial growth. Never leave custards at room temperature for more than two hours.
Container recommendations include the original ramekins or airtight glass containers. Glass prevents flavor absorption and allows you to see the custard. Avoid plastic containers that may retain odors. If you must stack, place parchment paper between layers.
Signs of spoilage include a sour smell, visible mold, or a watery texture. If the custard develops an off color or sliminess, discard it immediately. Fresh custard smells sweet and looks smooth. When in doubt, throw it out for safety.
Reheating instructions for crème brûlée are simple because you serve it cold. You do not reheat the custard itself. Instead, torch the sugar topping right before serving. If the custard feels too firm, let it sit at room temperature for five minutes. Never microwave the custard, as it will curdle.
Freezing guidelines for this dessert are not recommended. The custard separates and becomes watery when frozen and thawed. The delicate emulsion of cream and eggs does not survive freezing well. Therefore, make only what you plan to eat within three to four days. Fresh is always best for this creamy crème brûlée recipe.
Make Ahead Strategies
Prep timeline for this creamy crème brûlée recipe makes entertaining stress free. You can bake the custards up to three days in advance. Cool them completely, then wrap and refrigerate. On serving day, simply torch the sugar and serve. This schedule lets you focus on other dishes.
Storage between steps keeps each component fresh. After baking, cool the custards on a wire rack for thirty minutes. Then refrigerate them uncovered for one hour to prevent condensation. Finally, wrap tightly with plastic film. This layered approach ensures the best texture.
Quality impact assessment shows that made ahead custards taste just as good as fresh ones. The flavors actually deepen after a day in the refrigerator. The vanilla becomes more pronounced and the texture stays silky. Only the sugar topping must be fresh.
Assembly tips for make ahead serving include keeping the ramekins cold until the last moment. Set up your torch and sugar on a stable surface. Work quickly to caramelize each top without warming the custard. Serve immediately after torching.
Reheating guidelines do not apply to the custard, but you can refresh the topping. If the sugar softens, scrape it off and add a fresh layer. Torch again for a crisp finish. This trick works well if you need to re-serve leftovers.
Fresh element additions should happen right before serving. Add fresh berries, mint, or whipped cream at the last minute. These garnishes lose their appeal if added too early. Therefore, keep them separate until plating.
Scaling Instructions
Halving this creamy crème brûlée recipe works easily for smaller households. Simply divide all ingredients by two and use three ramekins instead of six. The baking time stays roughly the same, but check a few minutes earlier. Smaller batches chill faster, so you can enjoy dessert sooner.
Doubling or tripling the recipe suits large gatherings and holiday parties. Multiply all ingredients by two or three and use additional ramekins. You may need to bake in batches if your oven cannot fit all the ramekins at once. Keep the water bath setup consistent for each batch.
Equipment adjustments become necessary when scaling up. Use a larger roasting pan that fits all ramekins without crowding. Ensure the water bath reaches halfway up the sides of every ramekin. You may also need a second torch or extra fuel for a large batch.
Timing modifications for larger batches require attention. Doubling the recipe may add five to ten minutes to the baking time. Rotate the pan halfway through for even cooking. Always check for the jiggle test rather than relying solely on the clock.
Storage considerations for scaled recipes mean you need more refrigerator space. Clear a shelf before you start baking. Stack ramekins carefully with parchment between layers. Label with the date to track freshness.
Nutritional Deep Dive
Macro breakdown for this creamy crème brûlée recipe shows a rich dessert. Each serving contains approximately four hundred calories, most from fat. You get about twenty eight grams of fat, twenty grams of carbohydrates, and five grams of protein. These numbers reflect the indulgence of real cream and egg yolks.
Micronutrient analysis reveals important vitamins and minerals. The cream and egg yolks provide vitamin A, vitamin D, and choline. You also get small amounts of calcium, iron, and B vitamins. These nutrients support eye health, brain function, and bone strength.
Health benefits of this dessert come from its simple, whole ingredients. Unlike processed desserts, it contains no trans fats or artificial additives. The eggs offer high quality protein and healthy fats. Enjoying it occasionally fits into a balanced lifestyle.
Dietary considerations include lactose and egg content. People with dairy or egg allergies should avoid this dessert or use suitable substitutes. Those watching cholesterol may want to limit portions. Always consult your doctor for personalized advice.
Portion analysis shows that one ramekin makes a satisfying serving. The richness means you do not need a large portion to feel satisfied. Serve with fresh fruit to add fiber and volume. This balance keeps the dessert from feeling too heavy.
Weight management tips include enjoying this dessert as an occasional treat. Pair it with a lighter meal to balance your daily intake. Share a ramekin with a friend if you want a smaller portion. Mindful eating makes every bite more enjoyable.
Dietary Adaptations
Gluten free adaptation is naturally simple because this creamy crème brûlée recipe contains no flour or wheat. All the main ingredients, including cream, eggs, sugar, and vanilla, are gluten free. However, always check labels on vanilla extract and any added garnishes. Cross contamination in your kitchen is the only real concern.
Dairy free modification requires substituting the heavy cream. Full fat coconut cream works best and delivers a rich, creamy texture. Cashew cream also works well when blended smooth. Note that the flavor will change slightly depending on your choice. The custard may also set a bit softer than the original.
Vegan adaptation is challenging but possible with modern ingredients. Use coconut cream and a plant based egg substitute like aquafaba or silken tofu. Agar agar can help set the custard without eggs. The result tastes different but still offers a creamy, sweet dessert. Experiment to find the best combination.
Low carb adaptation focuses on reducing sugar. Use a sugar substitute like erythritol or monk fruit in the custard. For the topping, you still need real sugar to caramelize properly, but you can use a very thin layer. This keeps the carb count lower while preserving the classic crack.
Keto adaptation follows similar principles to low carb. Heavy cream and eggs fit perfectly into a ketogenic diet. Replace sugar with a keto friendly sweetener. Keep the topping layer minimal or use a sugar free caramel alternative. Check that all ingredients fit your daily macro goals.
Paleo adaptation requires careful ingredient selection. Use full fat coconut milk and raw honey or maple syrup in place of refined sugar. Eggs are paleo friendly, so the custard base works well. The caramelized topping poses a challenge because paleo avoids refined sugar. Consider a thin drizzle of honey torched lightly as a compromise.
Low FODMAP adaptation suits people with digestive sensitivities. Heavy cream contains lactose, which can trigger symptoms. Use lactose free cream or a suitable plant based alternative. Vanilla and sugar are generally safe on a low FODMAP diet. Always consult a dietitian for personalized guidance.
Troubleshooting Guide
Texture issues like curdling or rubbery custard usually come from overheating. If your custard looks lumpy, you likely baked it too long or at too high a temperature. Next time, lower the oven temperature by twenty five degrees. Also, check for doneness earlier and rely on the jiggle test.
Flavor balance problems arise when the custard tastes too sweet or too eggy. If it tastes eggy, you may have used too many yolks or undercooked the custard. Reduce the yolks slightly or add more vanilla. If it tastes too sweet, cut back on the sugar in the custard and rely on the topping for sweetness.
Temperature problems include uneven baking or a custard that will not set. An oven thermometer helps you verify the actual temperature. If your oven runs hot, adjust accordingly. A water bath that is too shallow also causes uneven baking, so always fill it halfway up the ramekins.
Equipment challenges often involve the kitchen torch or ramekins. If your torch sputters, check the fuel level and refill it. If you lack a torch, use your oven broiler on high, watching closely. Different ramekin sizes affect baking time, so adjust as needed.
Ingredient substitutions can change the final result significantly. If you swap cream for milk, expect a thinner custard. If you use a sugar substitute, the topping may not caramelize. Always test substitutions on a small batch first. This approach saves you from disappointing results.
Timing concerns usually mean the custard needs more or less baking. Every oven behaves differently, so start checking five minutes early. The custard should jiggle slightly in the center, not slosh. If it looks fully set, you have likely overbaked it.
Recipe Success Stories
Community feedback for this creamy crème brûlée recipe has been overwhelmingly positive. Readers report that the instructions are easy to follow and the results impressive. Many say it has become their go to dessert for special occasions. Several readers have shared photos of their beautifully torched custards on social media.
Variation successes include a reader who added lavender and honey for a spring version. Another used coconut cream for a dairy free adaptation that her family loved. A third reader topped the custard with fresh raspberries and mint. Each variation received rave reviews from family and friends.
Adaptation stories highlight how flexible this recipe truly is. One reader made it ahead for a dinner party and torched the sugar at the table. Another scaled it up for a wedding dessert bar with great success. A third reader made a low carb version for her diabetic mother. These stories show the recipe works for many lifestyles.
Reader suggestions include using a blowtorch for a more even crust. Others recommend adding a pinch of espresso powder to deepen the vanilla flavor. Some readers suggest chilling the custards in a cooler with ice for outdoor parties. These creative ideas keep the recipe fresh and exciting.
Photography tips from readers help others capture beautiful images. Natural light works best for showing the glossy caramel top. A slight angle reveals the creamy interior after cracking the crust. Props like fresh vanilla beans or berries add visual interest. These small touches make your photos stand out.
Frequently Asked Questions
Can I make this creamy crème brûlée recipe without a kitchen torch? Yes, you can use your oven broiler instead. Place the chilled custards on a baking sheet and sprinkle sugar on top. Broil on high for two to three minutes, watching constantly. The sugar will bubble and brown quickly, so stay close to the oven.
How do I know when the custard is fully baked? The custard should jiggle slightly in the center when you gently nudge the pan. It should not slosh like liquid or look completely firm. Remember that residual heat continues cooking after you remove it from the oven. This gentle jiggle indicates a perfect set.
Why did my custard crack on top? Cracks usually mean the custard baked too long or at too high a temperature. They can also happen if the water bath was too shallow. Next time, lower the oven temperature slightly and check for doneness earlier. Cracks do not affect flavor, so you can still serve the dessert.
Can I use milk instead of heavy cream? You can, but the texture will be much thinner and less creamy. Heavy cream provides the fat needed for a rich, stable custard. If you must use milk, choose whole milk and add an extra egg yolk for richness. The result will still differ from the original.
How long does this creamy crème brûlée recipe last in the fridge? Baked custards without the sugar topping last three to four days in the refrigerator. Always wrap them tightly to prevent moisture loss. Add the sugar topping just before serving for the best texture. Do not freeze the custards.
Can I make this dessert ahead of time? Yes, you can bake and chill the custards up to three days in advance. Keep them wrapped in the refrigerator. On serving day, torch the sugar and serve immediately. This make ahead approach simplifies entertaining.
What is the best sugar for the topping? Co Print
Vanilla Bean Crème Brûlée
- Total Time: 45 minutes
- Yield: 4
Description
A classic French dessert with a silky, creamy vanilla custard beneath a brittle, caramelized sugar crust. My grandmother always believed the best desserts should feel creamy, cozy, and a little unforgettable… and this Crème Brûlée is exactly that.
Ingredients
- 2 cups heavy cream
- 1 vanilla bean (or 2 teaspoons vanilla extract)
- 5 large egg yolks
- 1/2 cup granulated sugar, plus extra for topping
- 1/4 teaspoon salt
Instructions
- Preheat oven to 325°F (160°C). Split the vanilla bean lengthwise and scrape the seeds into a medium saucepan. Add the heavy cream and vanilla pod. Heat over medium until just simmering, then remove from heat and let steep for 15 minutes.
- In a bowl, whisk together egg yolks, 1/2 cup sugar, and salt until pale. Gradually whisk in the warm cream mixture. Strain through a fine-mesh sieve into a large measuring cup or bowl.
- Place 4 ramekins in a roasting pan. Divide the custard among the ramekins. Pour hot water into the pan until it comes halfway up the sides of the ramekins. Bake for 30-35 minutes, until the custards are set but still jiggle slightly in the center.
- Remove ramekins from the water bath and cool to room temperature, then refrigerate for at least 2 hours or overnight.
- Just before serving, sprinkle about 1 teaspoon of sugar evenly over each custard. Use a kitchen torch to melt and caramelize the sugar until dark amber and bubbly. Alternatively, place under a broiler for 1-2 minutes, watching closely. Let the crust harden for a minute, then serve.
Notes
You can customize the seasonings to taste. For a different flavor, substitute the vanilla bean with 1 teaspoon of espresso powder or citrus zest.
- Prep Time: 15 minutes
- Cook Time: 30 minutes
- Method: Dessert
- Cuisine: French