Elegant Black Velvet Cake: A Stunning Dessert for Any Occasion
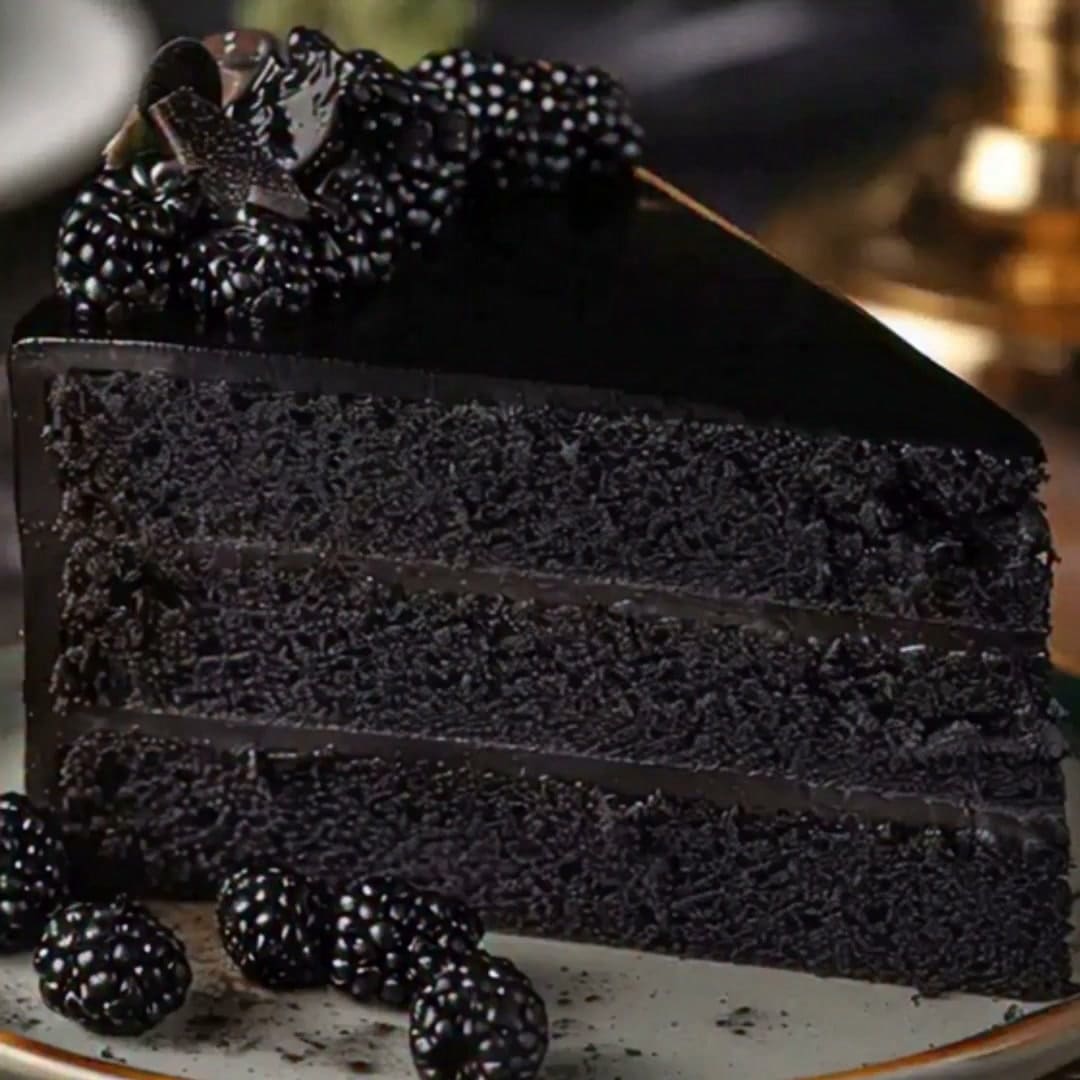
This Elegant Black Velvet Cake delivers a dramatic twist on the classic red velvet formula, and it never fails to impress a crowd. Imagine slicing into a deep, midnight-black crumb that contrasts beautifully with clouds of silky white cream cheese frosting. The moment your fork meets the cake, you notice a velvety texture that feels almost weightless, yet rich enough to satisfy the most devoted chocolate lover. Because the cocoa flavor runs deep and mellow, this Elegant Black Velvet Cake pairs wonderfully with a warm cup of coffee or a glass of cold milk.
Furthermore, this recipe strikes a balance between showstopping looks and everyday practicality. You probably already stock most of the ingredients in your pantry, so you can whip up this Elegant Black Velvet Cake without a special trip to the store. The striking color comes from black cocoa powder and a touch of gel food coloring, which together create that signature gothic glamour. Whether you bake for a birthday, a wedding shower, or a cozy weekend treat, this cake earns compliments before anyone even takes a bite.
Meanwhile, the frosting deserves its own moment in the spotlight. A tangy cream cheese buttercream balances the intense cocoa notes beautifully, and it pipes like a dream once you chill it properly. As a result, even beginner bakers can achieve clean edges and elegant swirls with a simple offset spatula. In short, this Elegant Black Velvet Cake offers a foolproof path to a bakery-quality dessert right in your own kitchen.
Quick Recipe Highlights
- Flavor Profile: Deep black cocoa delivers a bold, almost smoky chocolate taste that feels less sweet than traditional chocolate cake. A hint of vanilla and a touch of vinegar round out the flavor, so the finish stays balanced and bright.
- Texture: The crumb bakes up tender, moist, and velvety, largely thanks to buttermilk and a touch of oil. Each bite feels soft against the palate while the frosting adds a cool, creamy contrast.
- Aroma: Expect warm cocoa notes with a subtle tang from the buttermilk and cream cheese. As the cake bakes, your kitchen fills with an inviting chocolate scent that draws everyone to the oven.
- Visual Appeal: The jet-black layers create a dramatic backdrop for the bright white frosting. A few chocolate curls or fresh berries on top turn this cake into a genuine centerpiece.
- Skill Level Needed: You need basic baking skills and comfort with layering and frosting a cake. Intermediate bakers will find the process smooth, though beginners can succeed with patience and a chilled frosting bowl.
- Special Equipment: Two 9-inch round cake pans, parchment paper, an electric mixer, and an offset spatula cover the essentials. A rotating cake stand helps with decoration but is not strictly required.
Recipe Overview
- Difficulty Level: This cake lands squarely at the intermediate level because it involves multiple mixing steps and careful layering. However, the batter comes together in one bowl sequence, which keeps things manageable. If you have baked a layer cake before, you will feel right at home here. New bakers should simply read the full recipe first and prep ingredients ahead of time.
- Category: This dessert works as a celebration cake, a dinner party finale, or a holiday centerpiece. You can also slice it into smaller portions for afternoon tea or dessert buffets. Because it holds up well overnight, it suits potlucks and bake sales too.
- Cuisine: This recipe draws on Southern American baking traditions, where velvet cakes originated in the early twentieth century. The technique blends classic butter cake methods with buttermilk and vinegar for tenderness. Modern bakers then adapted the formula with black cocoa to create the gothic look. Today, it belongs to American dessert cuisine with a contemporary twist.
- Cost: Expect to spend roughly twelve to eighteen dollars on ingredients for the whole cake. Pantry staples like flour, sugar, and oil usually cost very little per use. The pricier items include cream cheese, butter, and black cocoa powder, which you can buy in bulk to save money over time.
- Season: This cake shines in fall and winter when rich, dark desserts feel especially cozy. Nevertheless, it works year-round for weddings, Halloween parties, or elegant Valentine dinners. The deep color also suits New Year celebrations and anniversary meals.
- Occasion: Birthdays, engagements, baby showers, and dinner parties all welcome this showstopper. The dramatic contrast makes it a natural fit for Halloween gatherings and gothic-themed weddings. It also works beautifully for quiet Sunday dinners when you want a little luxury.
Why You’ll Love This Recipe
First, the taste and texture of this Elegant Black Velvet Cake set it apart from ordinary chocolate cakes. Black cocoa powder brings a robust, almost oreo-like depth that regular cocoa cannot match. Because the batter includes buttermilk and vinegar, the crumb stays tender and moist for days. The cream cheese frosting adds a tangy counterpoint, so each bite feels balanced rather than cloying. In addition, the velvety mouthfeel makes this cake feel luxurious without any complicated professional techniques.
Second, convenience plays a big role in why bakers return to this recipe again and again. You mix the dry ingredients in one bowl and the wet ingredients in another, then combine them in minutes. The whole process takes about seventy-five minutes from start to finish, including cooling time between steps. Moreover, you can bake the layers a day ahead and frost them the next morning. As a result, this cake fits neatly into a busy schedule without stress.
Third, the nutritional angle deserves a fair mention, even for a dessert. Each slice delivers a reasonable amount of protein and calcium thanks to the cream cheese, eggs, and buttermilk. Black cocoa also contains antioxidants similar to those found in dark chocolate. Of course, this cake remains a treat, so enjoy it in sensible portions. Still, you get more than empty calories when you choose quality ingredients.
Fourth, the social and entertaining value of this Elegant Black Velvet Cake cannot be overstated. Guests gasp when you set it on the table because the black-and-white contrast looks striking. The cake slices cleanly, so serving a crowd feels effortless. Furthermore, it sparks conversation, and people always ask for the recipe. That kind of reaction turns an ordinary gathering into a memorable event.
Finally, this recipe remains remarkably cost-effective compared to bakery alternatives. A custom layer cake from a professional shop often costs sixty dollars or more. By contrast, you spend a fraction of that amount and control every ingredient. Additionally, you avoid preservatives and artificial stabilizers found in commercial cakes. Therefore, you save money while serving something far more personal and delicious.
Historical Background and Cultural Significance
The origin story of velvet cake traces back to the early 1900s in the American South. Bakers discovered that adding buttermilk and vinegar to cocoa created a fine, soft crumb they described as velvet. During World War II, rationing pushed bakers to use beet juice for color, which gave rise to the red velvet craze. Black velvet emerged later as a dramatic cousin, using dark cocoa and food coloring to push the color to near-black. Consequently, this cake carries a century of American baking history in every slice.
Cultural importance surrounds velvet cakes because they symbolize celebration and hospitality in the South. Families pass down their favorite versions through generations, and church cookbooks often feature several variations. The cake appears at Juneteenth gatherings, weddings, and Sunday suppers across the region. Because of this heritage, baking a velvet cake connects you to a long tradition of Southern home cooks. That sense of connection adds meaning beyond the ingredients themselves.
The recipe evolved over decades as cocoa processing improved and home ovens became more reliable. Early versions relied on butter and cake flour, while modern bakers often add oil for extra moisture. Food coloring shifted from beet juice to gel dyes, which produce a more consistent color. Meanwhile, black cocoa powder became widely available through specialty suppliers and online retailers. As a result, home bakers today can achieve results that once required a professional pastry kitchen.
Regional variations abound, and each one reflects local tastes and available ingredients. Some Southern bakers add a spoonful of coffee to deepen the cocoa flavor. Others swap cream cheese frosting for a cooked flour frosting, which tastes lighter and less sweet. In the Midwest, you sometimes find black velvet cake with cherry filling between the layers. Coastal bakers occasionally fold in espresso powder or orange zest for a citrusy twist. Therefore, no single version owns the name, and you can adapt freely.
Ingredient Deep Dive
Black cocoa powder serves as the soul of this Elegant Black Velvet Cake, and it deserves careful attention. This heavily Dutch-processed cocoa undergoes an alkalizing treatment that strips away acidity and deepens the color. Historically, Dutch cocoa makers developed this process in the nineteenth century to improve flavor and solubility. Nutritionally, black cocoa offers antioxidants called flavonols, which support heart health in moderate amounts. When you shop, look for a fine, dark powder with a smooth texture and no clumps. Store it in an airtight container away from light, and it keeps for up to two years. If you cannot find black cocoa, combine regular Dutch cocoa with a tablespoon of activated charcoal for a similar effect.
Buttermilk brings tang and tenderness to the batter, and it works hand in hand with baking soda. Southern bakers have relied on buttermilk for generations because it activates leavening and softens gluten. This ingredient also adds calcium and probiotics, though the baking process reduces the live cultures. Choose fresh buttermilk with a clean, tart smell and a thick pour. Keep it refrigerated and use within a week of opening. In a pinch, stir one tablespoon of lemon juice into a cup of whole milk and let it sit for ten minutes.
Cream cheese forms the backbone of the frosting, and its richness balances the intense cocoa. This soft cheese originated in New York dairy farms during the late 1800s and quickly became a staple of American baking. It supplies protein, calcium, and vitamin A, so the frosting contributes more than sugar alone. Select full-fat blocks rather than spreadable tubs, because blocks hold their shape better. Store cream cheese in the refrigerator and use it within two weeks of purchase. For a dairy-free version, swap in a plant-based cream cheese that contains coconut oil for structure.
Eggs provide structure, moisture, and lift, so they play a critical role in the final texture. Home bakers have used eggs as a binding agent for centuries across nearly every culture. Each egg adds about six grams of protein plus essential vitamins like B12 and choline. Pick fresh eggs with clean shells, and check the sell-by date before you buy. Keep them in the coldest part of your fridge, not the door. If you need a substitute, whisk one tablespoon of ground flaxseed with three tablespoons of water for each egg.
Common Mistakes to Avoid
- Skipping the cocoa blooming step leaves your cake flat and dull. Always whisk black cocoa into hot water or coffee before mixing, because this step dissolves lumps and deepens flavor. Without it, the batter turns grainy and the color looks muddy rather than rich.
- Overmixing the batter develops too much gluten and produces a tough, rubbery crumb. Stop mixing the moment the flour disappears into the wet ingredients. A few small streaks of flour are fine, since the final stir by hand finishes the job.
- Using cold cream cheese creates lumpy frosting that never smooths out. Let the cream cheese and butter sit at room temperature for at least an hour before you begin. If you forget, cut the blocks into cubes and warm them briefly in the microwave at low power.
- Underbaking the layers leaves a gummy center that sinks after cooling. Test doneness with a toothpick inserted into the middle, which should come out with a few moist crumbs. Also, rotate your pans halfway through the bake for even heat.
- Frosting a warm cake causes the buttercream to melt and slide right off. Cool the layers completely on a wire rack, and chill them for thirty minutes if you are short on time. A cold cake holds the frosting in place and creates cleaner edges.
- Adding too much food coloring ruins the flavor and thins the batter. Use gel coloring rather than liquid drops, and add it one small dab at a time. Black cocoa already darkens the batter, so you need far less than you might expect.
- Measuring flour by scooping directly from the bag packs in extra flour and dries out the cake. Spoon the flour into your measuring cup and level it with a knife instead. This simple habit keeps your cake moist and tender every time.
- Ignoring oven temperature swings leads to uneven baking and domed tops. Invest in an inexpensive oven thermometer and check the calibration before you bake. Most home ovens run hot or cold by twenty-five degrees or more.
- Skimping on the chilling time for the frosting produces a soupy mess. After you whip the buttercream, refrigerate it for twenty minutes and then beat it again. This step firms the texture and makes piping far easier.
- Rushing the assembly creates lopsided layers and messy sides. Place each layer flat-side down and press gently to level the stack. Then apply a thin crumb coat and chill before the final frosting layer.
Essential Techniques
Blooming cocoa powder ranks as the single most important technique in this recipe. This step involves whisking black cocoa into hot liquid, which dissolves cocoa butter and releases flavor compounds. When you skip blooming, the cocoa stays locked inside tiny clumps and the cake tastes flat. To master it, heat your water or coffee until it steams, then pour it slowly over the cocoa while whisking constantly. The mixture should turn glossy and smell intensely chocolatey. A common pitfall involves using boiling water, which can scorch the cocoa and create bitter notes. Look for a smooth, pourable paste with no dry pockets before you move on.
Creaming butter and cream cheese together creates the light, fluffy base for your frosting. This technique traps air inside the fat, which gives the frosting volume and a silky mouthfeel. Start with room-temperature ingredients and beat them on medium speed for three full minutes. You will notice the mixture pale slightly and grow noticeably lighter. Do not rush this stage, because under-creamed frosting tastes dense and heavy. Watch for a uniform texture with no lumps, and scrape the bowl twice during the process.
Folding dry ingredients into the wet batter by hand protects the delicate crumb. Once you add the flour mixture, switch from your mixer to a sturdy spatula. Use a gentle scoop-and-fold motion, turning the bowl a quarter turn after each fold. This method preserves air bubbles and prevents overdevelopment of gluten. Stop as soon as you see no dry flour, even if a few streaks remain. If you hear a deflating sound, you have folded too vigorously, so lighten your touch next time.
Leveling cake layers ensures a stable stack and professional-looking sides. After the layers cool, use a serrated knife to trim the domed top flat. Saw gently in a horizontal motion rather than pressing down, which prevents tearing. Alternatively, use a cake leveler for consistent results every time. Save the scraps for cake pops or a quick cook’s treat. A level layer sits flat, so your frosting lines look crisp and even.
Pro Tips for Perfect Elegant Black Velvet Cake
First, weigh your ingredients with a kitchen scale for the most consistent results. Volume measuring varies wildly depending on how you scoop, and small errors add up in a layer cake. A scale costs very little and improves every baking project you tackle.
Second, line your cake pans with parchment rounds and grease the sides generously. This step guarantees clean release, so your layers slide out without cracks or stuck corners. Spray the parchment lightly for extra insurance.
Third, chill your cake layers for thirty minutes before assembly. Cold layers resist sliding, and the frosting sets faster against them. This small pause makes a big difference in the final presentation.
Fourth, apply a thin crumb coat and refrigerate it for twenty minutes. The crumb coat traps stray crumbs and creates a smooth canvas for the final layer. Your finished cake will look neater because of this extra step.
Fifth, dip your offset spatula in hot water and dry it before smoothing the frosting. The warmth glides across the surface and leaves a polished finish. Wipe the blade clean between passes for the best effect.
Sixth, add a pinch of espresso powder to the batter for deeper chocolate flavor. The coffee does not make the cake taste like coffee, but instead amplifies the cocoa. This trick appears often in professional pastry kitchens.
Seventh, store the finished cake in the refrigerator but serve it at room temperature. Cold cake tastes muted, so let it sit out for thirty minutes before slicing. The flavors bloom as the cake warms.
Eighth, use a sharp, thin-bladed knife for slicing and wipe it between cuts. Clean slices photograph beautifully and serve neatly at parties. This simple habit makes every portion look bakery-perfect.
Variations and Adaptations
Regional variations offer endless ways to make this cake your own. Southern bakers sometimes add a tablespoon of brewed coffee to the batter for a richer cocoa note. In the Midwest, cooks layer cherry or raspberry preserves between the cakes for a fruity surprise. Coastal bakers occasionally fold orange zest into the frosting for a bright citrus lift. Each region puts its own stamp on the classic, and you can borrow ideas freely.
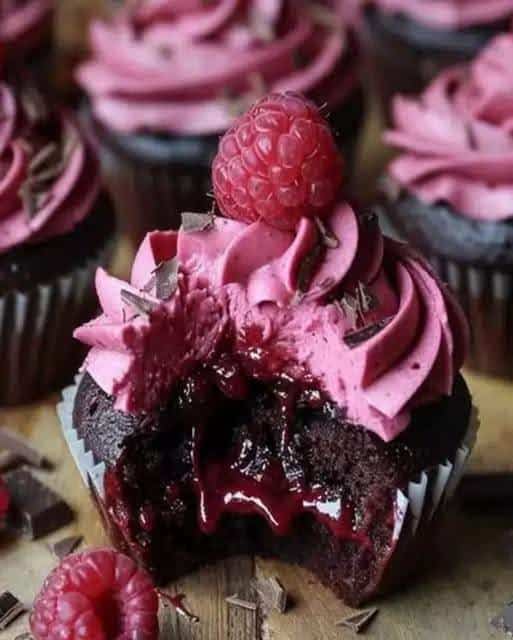
Seasonal adaptations let you enjoy this cake all year long. In spring, top the frosting with fresh raspberries and edible flowers for a light, romantic look. Summer calls for a berry compote spooned over each slice, which adds a juicy contrast. During fall, sprinkle cinnamon and nutmeg into the batter for a warm, cozy twist. Winter celebrations welcome peppermint extract and crushed candy canes on top.
Dietary modifications make this cake accessible to more guests. Swap the all-purpose flour for a gluten-free blend and add a half teaspoon of xanthan gum for structure. Replace the butter and cream cheese with plant-based versions to create a dairy-free cake. Vegans can use flax eggs and coconut oil, though the texture turns slightly denser. Always test a small batch first when you make big swaps.
Flavor variations range from subtle to bold, depending on your mood. Add a teaspoon of almond extract for a delicate, nutty background note. Stir in orange zest and a splash of Grand Marnier for a sophisticated adult version. For a spicy kick, blend in a quarter teaspoon of cayenne pepper with the cocoa. Each tweak changes the personality of the cake without altering the core technique.
Texture modifications let you play with mouthfeel. Fold in mini chocolate chips for pockets of crunch throughout each slice. Add crushed cookies between the layers for a s’mores-style effect. For a lighter cake, whip the egg whites separately and fold them in at the end. These small changes create a fresh experience each time you bake.
Presentation alternatives suit different occasions and skill levels. Bake the batter in a bundt pan for a simpler, elegant shape with a dusting of powdered sugar. Turn the layers into cupcakes and pipe tall swirls of frosting on top. For a naked cake look, scrape most of the frosting off the sides and leave the layers exposed. Choose the style that matches your event and your comfort level.
Serving and Presentation Guide
Plating techniques turn a simple slice into a memorable dessert. Place the slice slightly off-center on a white plate to highlight the dramatic contrast. Drag a swoosh of chocolate sauce beneath the cake using the back of a spoon. Add a few fresh berries or a dusting of cocoa for color and texture. These small touches elevate the presentation without extra effort.
Garnishing ideas range from minimalist to elaborate depending on the occasion. Chocolate curls made from a cold bar add instant elegance to the top of the cake. Fresh mint leaves or edible gold flakes create a jewel-like finish. For a rustic look, arrange whole blackberries and raspberries in a loose pile. Choose one strong garnish rather than many competing elements.
Traditional accompaniments include a scoop of vanilla bean ice cream or a dollop of whipped cream. A drizzle of warm fudge sauce makes the cake feel extra indulgent. Southern cooks often serve velvet cake with a glass of cold milk or sweet tea. These classic pairings highlight the cake’s nostalgic roots.
Modern serving suggestions push the boundaries a bit further. Try a slice with salted caramel sauce and a sprinkle of flaky sea salt for a sweet-salty contrast. Pair the cake with a shot of espresso for an after-dinner treat. Some hosts serve mini slices on a dessert board alongside truffles and macarons. This approach works beautifully for cocktail parties and receptions.
Temperature considerations matter more than most bakers realize. Serve the cake at room temperature so the frosting turns creamy and the crumb feels soft. Cold cake tastes flat and the frosting feels stiff. If you store it in the fridge, pull it out thirty minutes before serving. On hot days, keep the cake cool until the last moment.
Portion control tips help you serve neatly and avoid waste. Cut thin slices with a sharp knife and wipe the blade between cuts. For buffets, slice the cake in advance and arrange pieces on a platter. Smaller portions suit rich desserts like this one, so guests can enjoy without feeling overwhelmed. You can always offer seconds.
Wine and Beverage Pairing
Wine pairings for this Elegant Black Velvet Cake favor bold reds and sweet fortified options. A glass of Cabernet Sauvignon matches the deep cocoa notes with its dark fruit and tannins. Zinfandel brings jammy sweetness that complements the tangy frosting beautifully. For something sweeter, pour a tawny port or a glass of ruby port alongside each slice. These wines stand up to the intense chocolate without getting lost.
Non-alcoholic alternatives keep the celebration inclusive for every guest. Cold whole milk remains the classic pairing because its richness balances the cocoa. A glass of sparkling water with lime cuts through the sweetness and refreshes the palate. For a fun twist, serve a chocolate milkshake in small glasses alongside mini slices. Kids and adults both love this playful option.
Coffee and tea pairings elevate the experience for caffeine lovers. A double espresso brings out the roasted notes in the black cocoa. Cold brew offers a smoother, less acidic option for warm afternoons. For tea drinkers, a strong English breakfast blend or a smoky lapsang souchong works beautifully. Avoid delicate green teas, which disappear next to the bold cake flavor.
Temperature considerations apply to beverages just as they do to the cake. Serve red wines slightly below room temperature for the best aroma. Keep milk and sparkling water well chilled for contrast. Hot coffee should steam but never boil, since boiling water scalds the grounds. Thoughtful temperatures make every sip and bite feel intentional.
Serving suggestions tie the whole experience together. Offer two options, one alcoholic and one not, so guests can choose freely. Place small glasses on a tray beside the cake for a self-serve setup. Add a small card describing each pairing for a polished touch. These details make your dessert table feel curated and welcoming.
Storage and Shelf Life
Storage methods determine how long your cake stays fresh and delicious. Wrap the frosted cake loosely in plastic wrap, then place it inside an airtight cake carrier. For individual slices, press a piece of plastic directly against the cut surface. This barrier keeps air out and prevents the crumb from drying. Proper storage preserves moisture for up to five days.
Temperature requirements matter because cream cheese frosting spoils quickly at room temperature. Refrigerate the cake if you plan to keep it longer than four hours. A cool fridge slows bacterial growth and keeps the frosting firm. Let the cake sit out briefly before serving so the texture softens. Never leave it in direct sunlight or near a warm oven.
Container recommendations help you avoid common storage problems. A dedicated cake carrier with a tall dome protects the frosting from smudges. If you lack one, invert a large bowl over the cake plate and seal the edges. For slices, use stackable airtight containers with parchment between layers. Glass containers work well because they do not absorb odors.
Signs of spoilage tell you when to toss the cake without hesitation. Sour smells, visible mold, or a slick texture on the frosting all signal danger. If the cream cheese smells off, discard the whole cake rather than scraping the frosting. When in doubt, throw it out, because food safety always comes first.
Reheating instructions apply mainly to individual slices rather than the whole cake. A quick ten seconds in the microwave softens the crumb and melts the frosting slightly. For a crisp edge, warm a slice in a toaster oven at low heat for three minutes. Avoid high heat, which turns the frosting greasy and separates the butter.
Freezing guidelines let you bake ahead with confidence. Freeze unfrosted cake layers wrapped tightly in plastic and foil for up to three months. Thaw them in the refrigerator overnight before assembling. You can also freeze frosted slices on a tray, then transfer them to freezer bags. This approach gives you dessert on demand for weeks.
Make Ahead Strategies
A prep timeline keeps the process organized and stress-free. Bake the layers two days ahead and store them wrapped at room temperature. Make the frosting one day ahead and refrigerate it in an airtight bowl. On serving day, simply beat the frosting for a minute and assemble. This schedule spreads the work across several days.
Storage between steps protects quality at every stage. Cool baked layers completely before wrapping, or trapped steam turns them soggy. Press plastic wrap directly onto the frosting surface to prevent a skin from forming. Label each container with the date so you track freshness easily. These habits keep every component in top shape.
Quality impact assessment helps you decide what to make ahead. Cake layers actually improve overnight because the crumb settles and moistens. Frosting holds well for two days in the fridge with no loss of flavor. Assembled cake tastes best within twenty-four hours, though it stays good for five days. Plan your timeline around these windows.
Assembly tips make the final steps quick and clean. Set out all tools before you start, including the spatula, cake stand, and garnishes. Work on a turntable if you have one, since it speeds up smoothing. Chill the cake between the crumb coat and the final layer for the neatest finish. A little patience here pays off in the presentation.
Reheating guidelines for make-ahead cake stay simple. Serve at room temperature after a thirty-minute rest on the counter. If you must warm a slice, use short bursts of low heat. Avoid reheating the whole cake, which dries out the crumb. Fresh is best when it comes to this dessert.
Fresh element additions bring new life to a make-ahead cake. Add berries, mint, or chocolate curls right before serving for the best look. Whipped cream should go on at the last minute too. These finishing touches make the cake feel freshly made. Guests never guess you baked days earlier.
Scaling Instructions
Halving the recipe works well when you need a smaller cake for an intimate dinner. Divide every ingredient by two, including the leavening agents, and bake in two six-inch pans. Reduce the baking time by about ten minutes and check early. The frosting recipe halves cleanly too, with no texture issues. This size suits four to six guests nicely.
Doubling or tripling the recipe lets you feed a large crowd at a party or wedding. Multiply each ingredient precisely, and mix the batter in two separate bowls if your mixer cannot handle the volume. Bake in batches rather than overcrowding the oven. You will need more pans, so borrow from a friend or buy disposable ones. The frosting multiplies easily as long as your mixer has enough capacity.
Equipment adjustments prevent common problems when you scale up. Use a larger mixer bowl or split the batter between two bowls. For big batches, a stand mixer beats a hand mixer in both speed and consistency. Invest in extra cake pans so all layers bake at once for even results. These small changes keep quality high.
Timing modifications matter because larger batches take longer at every stage. Mixing takes more time, and the oven needs longer to recover its temperature between batches. Cooling also takes longer when you have many layers on the counter. Add extra buffer time to your schedule for a stress-free bake.
Storage considerations change when you make a big batch. Wrap each layer separately so you can use them as needed. Freeze extras for future celebrations rather than letting them sit in the fridge. Label everything with dates and contents for easy identification. Smart storage saves you time later.
Nutritional Deep Dive
The macro breakdown of this cake reflects its role as a rich dessert. Each slice contains roughly four hundred and fifty calories, with about fifty grams of carbohydrates and twenty-four grams of fat. Protein lands around five grams per slice thanks to the eggs and cream cheese. These numbers vary based on slice size and frosting thickness. Treat these figures as estimates for planning purposes.
Micronutrient analysis reveals more than empty calories in each bite. Black cocoa supplies iron, magnesium, and antioxidants called flavonols. Eggs contribute vitamin B12, choline, and selenium, which support brain and immune health. Cream cheese adds calcium and vitamin A for bone strength. Small amounts of these nutrients add up over time.
Health benefits in a dessert context deserve honest framing. Dark cocoa links to improved blood flow and reduced inflammation in some studies. The antioxidant content in black cocoa exceeds that of milk chocolate, though sugar remains a concern. Enjoy this cake as part of a balanced diet rather than a health food. Moderation keeps dessert enjoyable and sustainable.
Dietary considerations help guests with restrictions plan their portions. This cake contains gluten, dairy, and eggs in its standard form. People with allergies should check labels on cocoa and cream cheese for cross-contamination warnings. Those watching sugar intake can reduce the frosting sugar by a quarter without major flavor loss. Communication with guests prevents awkward moments.
Portion analysis guides sensible serving sizes. A standard slice measures about one-twelfth of a nine-inch layer cake. Cutting thinner slices at parties lets guests sample without overindulging. Smaller portions also stretch the cake further and reduce waste. Pair each slice with fresh fruit for balance.
Weight management tips help you enjoy dessert without guilt. Plan your treat into your daily calories rather than treating it as a cheat. Eat a protein-rich meal before dessert to slow sugar absorption. Savor each bite slowly and stop when you feel satisfied. These habits make dessert a pleasure, not a problem.
Dietary Adaptations
Gluten-free versions require a quality one-to-one flour blend and a binder like xanthan gum. Replace the all-purpose flour cup for cup and add half a teaspoon of xanthan gum for structure. The crumb turns slightly denser, so do not overmix the batter. Check that your cocoa and extracts are certified gluten-free. Most guests cannot tell the difference in a frosted cake.
Dairy-free adaptations swap buttermilk, butter, and cream cheese for plant-based alternatives. Use oat milk with a tablespoon of lemon juice in place of buttermilk. Replace butter with a vegan butter stick and cream cheese with a coconut-oil-based variety. The frosting firms up in the fridge and tastes tangy and rich. Serve the cake chilled for the best texture.
Vegan versions build on the dairy-free swaps and replace the eggs too. Whisk three tablespoons of aquafaba or two flax eggs into the wet ingredients for binding. The cake rises slightly less, so add an extra quarter teaspoon of baking soda. Check that your sugar is vegan, since some brands process it with bone char. The result tastes moist and deeply chocolatey.
Low-carb versions cut the sugar and swap the flour for almond or coconut flour. Replace the granulated sugar with a monk fruit or erythritol blend at a one-to-one ratio. Almond flour needs extra eggs for structure, so add one additional egg. The texture turns denser and more fudgy, which many people love. Adjust the liquid slightly because almond flour absorbs differently.
Keto adaptations push the low-carb version even further by removing all refined sugar. Use a keto-friendly sweetener and add a tablespoon of coconut flour for bulk. The frosting uses powdered erythritol instead of confectioners sugar. Beat it well to remove any graininess before spreading. These swaps keep the cake within strict carb limits.
Paleo versions rely on almond flour, coconut flour, and natural sweeteners like honey or maple syrup. Skip the food coloring and let the black cocoa carry the color. Replace the cream cheese frosting with a coconut cream-based alternative. The result tastes naturally sweet and grain-free. Expect a slightly different texture than the original.
Low-FODMAP versions limit ingredients that trigger digestive issues for sensitive people. Use lactose-free buttermilk and a lactose-free cream cheese substitute. Avoid high-FODMAP sweeteners like honey and choose maple syrup in small amounts. Keep portions modest because cocoa can bother some sensitive stomachs. These tweaks make the cake friendlier for guests with IBS.
Other specific diets, such as nut-free or egg-free, require simple swaps. For nut-free, avoid almond flour and use a seed-based flour instead. Egg-free versions use aquafaba or a commercial egg replacer with good results. Always test a small batch first when you make major changes. This habit saves you from wasting ingredients on a failed experiment.