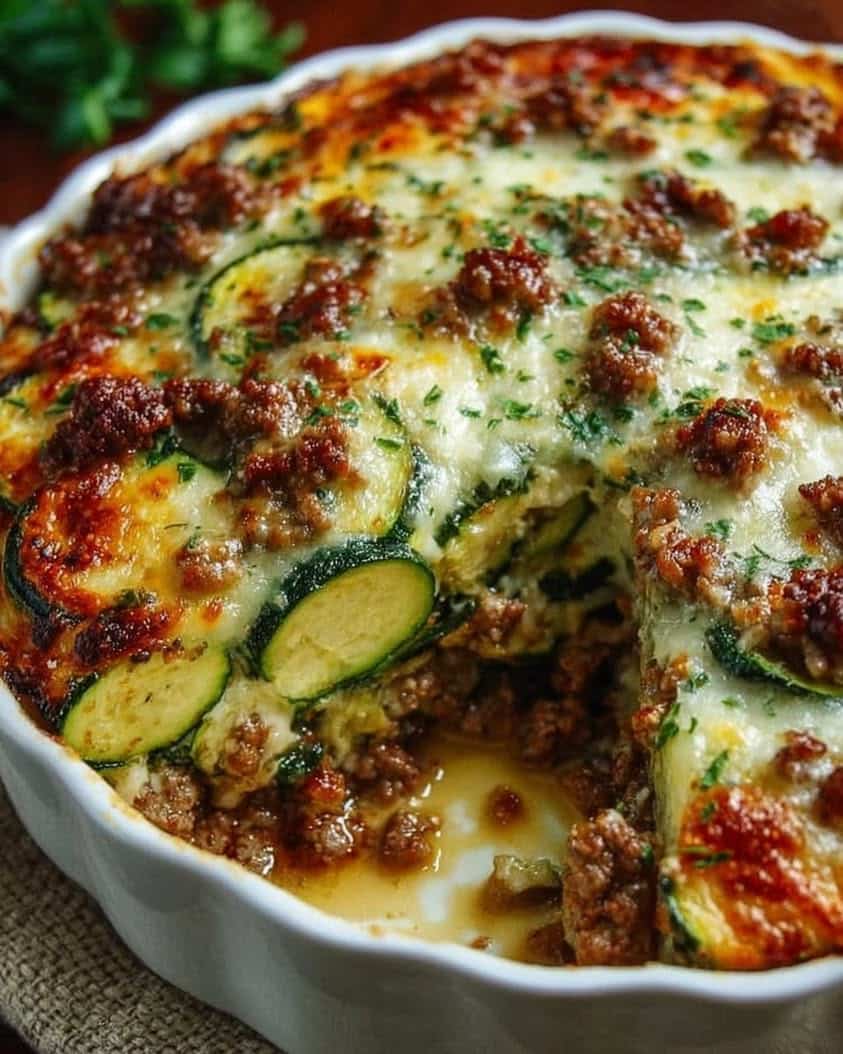
Easy No Bake Cheesecake Cups Recipe for a Perfect Dessert
Imagine a dessert that delivers all the creamy, tangy bliss of a classic cheesecake but skips the oven entirely. This Easy No Bake Cheesecake Cups Recipe for a Perfect Dessert is your ultimate solution for a stunning, fuss-free treat. Consequently, you get individual portions of velvety filling nestled in a buttery graham cracker crust, all ready after just minutes of hands-on work. Moreover, the charm lies in its simplicity; you can whip up these delightful cups for a weeknight craving or a last-minute gathering without breaking a sweat.
The beauty of this no bake cheesecake recipe extends beyond its convenience. For instance, each cup is a blank canvas for your favorite toppings, from fresh berries to rich chocolate sauce. The filling itself is luxuriously smooth, with the perfect balance of rich cream cheese and a hint of vanilla. Ultimately, these cups chill to a perfect, sliceable consistency without any gelatin, relying instead on the magic of whipped cream and patience. They are the epitome of a make-ahead dessert that impresses every single time.
Furthermore, this recipe celebrates the joy of personal desserts. Everyone gets their own perfectly portioned cup, eliminating the mess of slicing a whole pie. The individual presentation feels special and thoughtful, whether you are serving family or guests. In essence, this Easy No Bake Cheesecake Cups Recipe for a Perfect Dessert proves that incredible flavor and elegance don’t require complex techniques or hours in the kitchen. It is a testament to the power of a few quality ingredients combined smartly.
Quick Recipe Highlights
- Flavor Profile: This dessert features a classic, tangy cream cheese base perfectly sweetened and enhanced with pure vanilla. The graham cracker crust adds a nostalgic, honey-kissed, and slightly salty contrast that makes every bite complex and satisfying.
- Texture: You will experience a delightful contrast between the crunchy, sandy graham cracker crust and the impossibly smooth, dense, and creamy cheesecake filling. The filling sets firm enough to hold its shape yet melts luxuriously on the tongue.
- Aroma: The scent of toasted graham crackers and melted butter forms the base note, followed by the fresh, sweet fragrance of vanilla and the subtle, clean dairy note of the cream cheese filling as you lift the cup to take a bite.
- Visual Appeal: These individual cups are incredibly photogenic with their defined layers. The golden crust, stark white filling, and vibrant pop of colorful toppings like berries or fruit compote create a dessert that looks as good as it tastes.
- Skill Level Needed: This is a beginner-friendly recipe requiring no special pastry skills. The most advanced technique is properly whipping cream to stiff peaks. Essentially, if you can use a mixer and a spatula, you can master this perfect dessert.
- Special Equipment: You only need a hand or stand mixer, a set of mixing bowls, and a muffin tin with liners. No springform pans, water baths, or thermometers are necessary, making this recipe highly accessible for any home cook.
Recipe Overview
- Difficulty Level: We rate this recipe as “Easy” because it involves straightforward mixing and no baking or precision temperature control. The steps are simple: crush, mix, whip, and chill. There is no risk of over-baking or cracking, which are common hurdles in traditional baked cheesecake recipes.
- Category: This recipe falls squarely into the dessert category, specifically individual desserts and no-bake treats. It is also an excellent option for potlucks, picnics, and packed lunches since each serving is self-contained and portable.
- Cuisine: While cheesecake has ancient roots, the modern no-bake version with a graham cracker crust is a distinctly American innovation. This recipe embraces that classic American diner and potluck tradition, offering a familiar and beloved flavor profile in a convenient format.
- Cost: This is a very cost-effective dessert. Cream cheese, heavy cream, and graham crackers are pantry staples often already on hand. The recipe yields six generous servings for roughly the cost of one slice at a restaurant, making it budget-friendly for families and entertaining.
- Season: This perfect dessert is truly year-round. It is cool and refreshing for summer gatherings, requires no oven during heat waves, and serves as a light yet indulgent finish to heavy winter meals. It is especially popular during holidays when oven space is at a premium.
- Occasion: These cups are versatile for any event. They are ideal for birthday parties, baby showers, holiday feasts, or a simple weeknight “treat yourself” moment. Their individual nature makes them perfect for events where you need controlled, elegant portions.
Why You’ll Love This Recipe
First and foremost, the taste and texture are utterly irresistible. The creamy, tangy filling made from smooth cream cheese and lightly sweetened whipped cream is a timeless combination that pleases nearly every palate. Paired with the sweet, crunchy graham cracker crust, each bite offers a perfect harmony of flavors and mouthfeels. This Easy No Bake Cheesecake Cups Recipe for a Perfect Dessert delivers restaurant-quality satisfaction from your own kitchen, guaranteed to earn you compliments.
Secondly, the convenience factor is unmatched. Since there is no baking involved, you avoid the common pitfalls of traditional cheesecakes like cracks, sinking, or over-baking. You simply mix, assemble, and let the refrigerator do the work. This makes it an ideal project for novice bakers or for days when you want an impressive result with minimal effort. The process is straightforward and stress-free.
Additionally, you have more control over the ingredients. You can choose full-fat or reduced-fat dairy, adjust the sweetness to your liking, and select high-quality vanilla for the best flavor. This homemade approach often results in a fresher, less cloyingly sweet dessert than many store-bought versions. You know exactly what goes into each cup, which is a significant advantage for many home cooks.
From a social perspective, these individual cheesecake cups are fantastic for entertaining. They are already pre-portioned, which simplifies serving and eliminates the mess of cutting a pie. You can create a beautiful dessert bar by setting out an array of toppings like fresh fruit, sauces, nuts, or sprinkles, allowing guests to customize their own perfect dessert. This interactive element adds fun to any party.
Finally, this recipe is incredibly cost-effective and accessible. The ingredients are basic and easy to find at any grocery store. You do not need any specialty equipment beyond a mixer. Compared to buying a whole cheesecake or individual desserts from a bakery, making these at home saves a considerable amount of money while yielding a superior, made-with-love product. It is a win-win for your taste buds and your wallet.
Historical Background and Cultural Significance
The story of cheesecake begins not in modern America, but in ancient Greece. Historians believe the earliest form was served to athletes at the first Olympic Games in 776 BC as a source of energy. This primitive version was simple: cheese pounded smooth with honey and wheat. The Roman Empire later adopted and spread the recipe across Europe, where it evolved with regional ingredients like ricotta in Italy and curd cheese in England.
Cheesecake arrived in America with European immigrants. However, the invention of cream cheese in the late 19th century, specifically Philadelphia brand cream cheese, revolutionized the dessert. This new, smooth, and spreadable cheese became the undisputed star of the American cheesecake. The graham cracker crust, an innovation of the early 20th century, provided a convenient, no-roll alternative to pastry crust, further cementing the dessert’s place in American culinary culture.
The no-bake version gained massive popularity in the mid-20th century, coinciding with the rise of home refrigeration and convenience foods. Recipes using gelatin or, as in this case, whipped cream to set the filling became staples in community cookbooks and women’s magazines. They offered a way to enjoy the beloved flavor of cheesecake without the precision and time required for baking, making it a democratic dessert for home cooks of all skill levels.
Today, the no-bake cheesecake, especially in individual cup form, represents a fusion of this long history with modern demand for convenience and portion control. It honors the classic flavor profile while adapting to contemporary lifestyles. From its ancient origins to its status as a potluck superstar, this dessert carries a rich cultural legacy in every creamy, no-bake bite.
Ingredient Deep Dive
Cream Cheese: This is the undisputed star. Originating in New York in the 1870s, cream cheese provides the signature tangy, rich base. For best results, always use full-fat, brick-style cream cheese and ensure it is softened completely to room temperature. This guarantees a lump-free, silky filling. Cold cream cheese will result in a chunky, difficult-to-mix batter. If you need a substitute in a pinch, full-fat Greek yogurt or mascarpone can work, but they will alter the flavor and texture profile significantly.
Heavy Whipping Cream: This ingredient serves two critical functions: it lightens the dense cream cheese and, when whipped, provides the structure that sets the cheesecake without baking. The air incorporated during whipping expands when chilled, giving the filling its firm yet creamy texture. For success, ensure your cream, bowl, and beaters are very cold. You can substitute with stabilized whipped topping for a different result, but real cream offers superior flavor and a cleaner ingredient list.
Graham Crackers: The classic American crust. Invented by Sylvester Graham in the 1820s as part of a vegetarian diet, they now bring a sweet, honeyed, and slightly nutty crunch. For the crust, you will crush them into fine crumbs. You can use a food processor or place them in a zip-top bag and roll with a rolling pin. For a twist, try substituting with digestive biscuits, vanilla wafers, or even crushed Oreos for a different flavor dimension.
Granulated Sugar: It sweetens both the crust and the filling. In the crust, it helps the crumbs caramelize slightly and bind together. In the filling, it dissolves into the cream cheese, balancing the tang. You can adjust the amount to your taste or use alternatives like confectioners’ sugar in the filling for a slightly smoother texture. For a deeper flavor, you could use a portion of brown sugar in the crust.
Unsalted Butter: Melted butter acts as the glue for the graham cracker crust, helping it hold together in a firm, sandy layer when chilled. Using unsalted butter allows you to control the salt level in the recipe. The butter should be melted but not hot when mixed with the crumbs. If you only have salted butter, simply omit the added pinch of salt in the crust recipe.
Common Mistakes to Avoid
- Using Cold Cream Cheese: This is the number one error. Cold cream cheese will not blend smoothly with the other ingredients, leaving you with a lumpy filling. Always plan ahead and let your cream cheese sit on the counter for at least one to two hours until it is perfectly soft.
- Under-whipping the Cream: If your heavy cream is only whipped to soft peaks, it will not provide enough structure. The filling may not set firmly and could weep or collapse. Whip until you have distinct, firm peaks that hold their shape when the beaters are lifted.
- Over-whipping the Cream: Conversely, whipping the cream too far turns it into butter. If you see the cream becoming grainy or separating, you have gone too far. Watch carefully and stop as soon as you achieve stiff, smooth peaks.
- Not Packing the Crust: Gently pressing the crumb mixture firmly into the bottom of each liner is crucial. A loose crust will fall apart when you try to eat the cheesecake cup. Use a small glass or measuring spoon to press it into an even, compact layer.
- Skipping the Chill Time: Impatience is the enemy of no-bake desserts. The cups need a minimum of 4 hours in the fridge to set properly. Trying to serve them too early will result in a soupy, messy dessert. For the best texture, chill overnight.
- Adding Wet Toppings Too Early: If you top your cups with fresh fruit like sliced strawberries or a juicy compote right after assembling, the moisture will seep into the crust and make it soggy. Always add wet toppings just before serving.
- Using the Wrong Cream Cheese: Avoid spreadable cream cheese sold in tubs, as it contains added stabilizers and has a different moisture content. This can prevent proper setting. Always use the solid, brick-style full-fat cream cheese.
- Not Tasting the Filling: Before you fold in the whipped cream, taste the sweetened cream cheese mixture. This is your chance to adjust the sugar or vanilla to your personal preference. Once the cream is folded in, you cannot adjust it without deflating the mixture.
Essential Techniques
Properly Softening Cream Cheese: This technique is foundational. Remove the cream cheese from its foil wrapping and place it on a plate at room temperature for 1-2 hours. Do not try to speed this up in the microwave, as it can melt parts of the brick and create an uneven texture. Perfectly softened cheese will blend seamlessly with the sugar and vanilla, creating a velvety-smooth base for your Easy No Bake Cheesecake Cups Recipe for a Perfect Dessert.
Whipping Cream to Stiff Peaks: Start with a chilled metal bowl and beaters. Pour in the cold heavy cream and begin mixing on medium speed. As it thickens, gradually increase the speed to high. Stiff peaks are achieved when you lift the beaters and the cream forms sharp, upright peaks that do not curl over at the tips. The cream will look thick and hold its shape firmly. This provides the necessary aeration and structure.
The Fold-In Method: This is how you incorporate the whipped cream into the cream cheese base without deflating it. Add about one-third of the whipped cream to the cream cheese mixture first. Use a spatula to gently stir and lighten the dense base. Then, add the remaining cream. Using a cutting-and-folding motion with the spatula—scooping from the bottom of the bowl up and over the top—gently combine until no white streaks remain.
Creating a Firm Crust: After spooning the graham cracker mixture into your liners, you must compact it. Use a small, flat-bottomed object like a shot glass, tart tamper, or the back of a measuring spoon. Press down firmly and evenly to create a solid, uniform layer. A well-packed crust will hold together when you bite into the finished cheesecake cup, providing that essential textural contrast.
Pro Tips for Perfect No Bake Cheesecake Cups
For an extra-stable filling, add a tablespoon of confectioners’ sugar to the heavy cream before whipping. The cornstarch in the sugar helps stabilize the whipped cream.
Line your muffin tin with parchment paper liners instead of standard paper liners. They peel away cleaner and don’t leave wrinkles on the sides of your beautiful cheesecake filling.
Use a cookie scoop or a large piping bag to portion the filling into the cups. This creates a neat, professional look and is much less messy than using a spoon.
Run a small offset spatula or knife under hot water, dry it, and then use it to smooth the top of the filling in each cup for a flawless, bakery-style finish.
If your kitchen is very warm, place your mixing bowl for the whipped cream in the freezer for 10-15 minutes before you start. A colder bowl whips cream faster and more effectively.
For a more complex crust flavor, toast your graham cracker crumbs in a dry skillet over medium heat for 3-4 minutes before mixing with the butter and sugar. Let them cool completely first.
Always scrape down the sides of your bowl several times when mixing the cream cheese and sugar to ensure everything is evenly incorporated and smooth.
For the cleanest presentation when serving, use a sharp paring knife to gently loosen the edges of the cheesecake from the liner before peeling it away completely.
Variations and Adaptations
Regional Variations: Explore global twists! For a German influence, use speculoos cookie crumbs for the crust. For a tropical feel, add a tablespoon of lime zest to the filling and use a crushed ginger snap crust. A French-inspired version could incorporate a layer of lemon curd at the bottom of the cup before adding the filling.
Seasonal Adaptations: In spring, fold a few tablespoons of lemon curd into the filling for a swirl and top with fresh blueberries. For summer, mix in pureed ripe mango and top with toasted coconut. In fall, incorporate pumpkin puree and warm spices into the filling. For winter, add a splash of peppermint extract and top with crushed candy canes.
Dietary Modifications: For a gluten-free version, use certified gluten-free graham crackers or almond flour mixed with a little sugar and butter for the crust. For a dairy-free option, use plant-based cream cheese and coconut cream (the solid part from a can of full-fat coconut milk) whipped with a stabilizer.
Flavor Variations: The base is incredibly versatile. Blend in melted and cooled chocolate for a chocolate cheesecake. Swirl in fruit purees like strawberry or raspberry. Add instant espresso powder for a mocha version. Incorporate peanut butter or cookie butter for a nutty, decadent twist.
Texture Modifications: For a denser, New York-style texture, reduce the heavy cream by a quarter and add an extra ounce of cream cheese. For a lighter, mousse-like texture, increase the whipped cream by a quarter. You can also add a thin layer of fruit gelatin or chocolate ganache on top for a different textural element.
Presentation Alternatives: Skip the muffin tin and layer the crust and filling in elegant glass dessert cups or martini glasses for a parfait-style treat. You can also set the mixture in a square pan and cut it into bars. For a festive look, use silicone molds in fun shapes like hearts or stars.
Serving and Presentation Guide
Plating Techniques: For a simple yet elegant plate, place a single cheesecake cup slightly off-center on a small dessert plate. You can add a drizzle of sauce in an artistic swoosh on the plate first. Alternatively, serve them directly in the liners on a decorative platter for a casual, rustic look that’s easy for guests to grab.
Garnishing Ideas: Fresh mint leaves add a pop of color and fresh aroma. A light dusting of cocoa powder, cinnamon, or graham cracker crumbs over the top looks professional. Chocolate shavings, citrus zest, or edible flowers are also stunning, simple garnishes that elevate the presentation instantly.
Traditional Accompaniments: A classic berry compote—made by simmering berries with a little sugar and lemon juice until syrupy—is a timeless pairing. Fresh, whole berries like raspberries, blackberries, or blueberries are also perfect. A dollop of lightly sweetened whipped cream on top never fails.
Modern Serving Suggestions: Create a DIY cheesecake cup bar with small bowls of toppings: salted caramel sauce, hot fudge, chopped nuts, sprinkles, crushed cookies, or fresh fruit salad. This interactive approach is a huge hit at parties. You can also serve them with a side of espresso or a dessert wine for an adult gathering.
Temperature Considerations: These cups are best served chilled straight from the refrigerator. However, for the fullest flavor, let them sit at room temperature for about 5-10 minutes before serving. This slight warming allows the creamy flavors to bloom and the texture to become optimally soft and luscious.
Portion Control Tips: The beauty of this recipe is its built-in portion control. Each standard muffin cup yields a satisfying single serving. For a larger crowd or as part of a bigger dessert spread, you can use a mini muffin tin to create bite-sized versions. Conversely, for a more decadent individual dessert, use jumbo muffin liners and increase the chill time.
Wine and Beverage Pairing
Wine Pairings: The creamy, tangy nature of cheesecake pairs beautifully with wines that have good acidity and a touch of sweetness. A classic Late Harvest Riesling or a Moscato d’Asti complements the dessert without overpowering it. For a richer pairing, try a Cream Sherry or a Tawny Port. The nutty notes in these fortified wines echo the graham cracker crust wonderfully.
Non-Alcoholic Alternatives: Sparkling apple cider or ginger ale provides a festive, fizzy contrast that cleanses the palate. A tart cherry or pomegranate spritzer made with club soda and a splash of juice can mirror the effect of a red wine pairing. Iced herbal tea, like mint or lemon verbena, is also a refreshing choice.
Coffee and Tea Pairings: A medium-roast coffee or a latte is a classic partner, with the bitterness cutting through the richness. For tea, consider a bold, malty Assam black tea or an Earl Grey, whose bergamot notes are lovely with citrus-topped cheesecake cups. A chai tea latte with its warm spices is a cozy, autumnal pairing.
Temperature Considerations: Serve white and sparkling wines well-chilled. Fortified wines like Port are best at a cool room temperature. Non-alcoholic sparklers should be ice-cold. Coffee can be served hot or as iced coffee, depending on the season. The key is to ensure your beverage is at its ideal serving temperature to provide the best contrast to the cold dessert.
Serving Suggestions: Offer a small pour of dessert wine in a proper wine glass alongside the cheesecake cup. For coffee, serve it in a mug with cream and sugar on the side. When serving a crowd, you can create a beverage station with a carafe of cold brew coffee, a bottle of sparkling cider, and a pot of hot tea, allowing guests to choose their perfect pairing.
Storage and Shelf Life
Storage Methods: Keep the assembled cheesecake cups covered tightly with plastic wrap or in an airtight container in the refrigerator. If stacking them, place a layer of parchment paper between layers to prevent the liners from sticking to the plastic wrap above. Always store them without wet toppings if planning to keep them for more than a day.
Temperature Requirements: Constant refrigeration at or below 40°F (4°C) is non-negotiable. The dairy-based filling is perishable. Do not leave the cups at room temperature for more than two hours to prevent bacterial growth. For serving, it is safe to have them out for the duration of your meal or gathering.
Container Recommendations: A deep, rectangular storage container with a tight-fitting lid is ideal. You can also use the original muffin tin covered tightly with foil, but this takes up significant refrigerator space. For individual portions, you can store them in separate small, lidded containers, which is perfect for packed lunches.
Signs of Spoilage: Discard the cheesecake cups if you notice an off or sour smell, significant separation of liquid (more than a few tiny droplets), or any signs of mold. The crust may soften over time, but that is a texture issue, not necessarily spoilage. When in doubt, it is safest to throw it out.
Reheating Instructions: This dessert is not meant to be reheated. It is designed to be served cold. If you find the filling too firm straight from the fridge, simply let the cup sit on the counter for 5-10 minutes to soften slightly before eating.
Freezing Guidelines: You can freeze these cups successfully for up to 1 month. Place the fully set cups (without toppings) on a baking sheet and freeze until solid, about 2 hours. Then, transfer them to a freezer-safe bag or container. Thaw overnight in the refrigerator before serving. Note that the texture of the whipped cream may become slightly less airy after freezing.
Make Ahead Strategies
Prep Timeline: This is the ultimate make-ahead dessert. You can prepare the crusts and filling, assemble the cups, and refrigerate them for up to 3 days before serving. The flavor often improves after a day, as the ingredients meld together. For the best texture, add any fresh fruit, sauces, or whipped cream garnishes just before serving.
Storage Between Steps: If you want to break up the work, you can make the graham cracker crusts a day ahead. Simply prepare the crumb mixture, press it into the liners, cover the whole muffin tin tightly with plastic wrap, and store at room temperature. The next day, make the filling and assemble. The crust may soften slightly but will still be delicious.
Quality Impact Assessment: Making these cups a day in advance is highly recommended. The extended chilling time allows the crust to fully set and absorb a hint of moisture from the filling, creating a perfect, cohesive bite. The filling also firms up beautifully. The only potential downside is the crust losing a tiny bit of its initial crispness, but most find this a worthwhile trade-off for the convenience.
Assembly Tips: When assembling ahead, be meticulous about smoothing the top of the filling. Any peaks or swirls can dry out slightly on the surface in the fridge. A smooth top stays creamier. Also, press a piece of plastic wrap directly onto the surface of the filling in each cup to prevent a skin from forming.
Reheating Guidelines: As a no-bake, chilled dessert, reheating is not applicable. The only “finishing” step required is taking them from the refrigerator and adding your chosen toppings. Let them temper for a few minutes on the counter if you prefer a slightly softer texture.
Fresh Element Additions: Plan your make-ahead strategy around your toppings. Anything wet (fruit compote, syrups) should be added at the last minute. Dry toppings (chopped nuts, cookie crumbs, sprinkles) can be added up to a few hours ahead. Fresh berry garnishes should be washed and placed on top no more than an hour before serving to prevent them from wilting or leaking juice.
Scaling Instructions
Halving the Recipe: To make three cups, simply divide all ingredient quantities by two. Use a standard 6-cup muffin tin; the empty cups will not affect the outcome. The mixing and chilling times remain the same. This is perfect for a small family or a couple wanting a treat without too many leftovers.
Doubling or Tripling: For a party, you can easily double or triple the recipe. Use multiple muffin tins or work in batches. When mixing a large batch of filling, ensure your mixing bowl is large enough. You may need to whip the cream in two batches to avoid overfilling your mixer. Chill time remains 4 hours minimum, but for a very full refrigerator, allow extra time for the center cups to set completely.
Equipment Adjustments: When scaling up, you will need enough muffin tin cavities and liners. Consider using disposable aluminum muffin pans if you need to stack them in the fridge. For a massive batch, you could set the dessert in a 9×13 pan and cut it into squares, though you lose the individual cup presentation.
Timing Modifications: The hands-on prep time will increase linearly as you make more. Allow extra time for portioning the crust and filling into many cups. The passive chill time does not change significantly, but ensure your refrigerator is not overcrowded, as air needs to circulate for even cooling.
Storage Considerations: A larger batch means you will need ample refrigerator space. Plan ahead and clear a shelf. Storing many cups may require multiple containers. Remember that the shelf life remains 3-4 days, so scale according to how many people you are serving and how quickly the desserts will be eaten.
Nutritional Deep Dive
Macro Breakdown: A single cheesecake cup is a rich source of energy, primarily from fats and carbohydrates. The cream cheese and heavy cream provide saturated fats, which contribute to the luxurious mouthfeel and satiety. The carbohydrates come from the sugar and graham crackers, offering quick energy. The protein content, mainly from the dairy, helps balance the dessert, making it more satisfying than a purely sugary treat.
Micronutrient Analysis: Dairy-based desserts like this provide essential nutrients. Cream cheese and heavy cream offer calcium for bone health, vitamin A for vision and immunity, and riboflavin (B2) for energy metabolism. Using real butter in the crust adds a small amount of vitamins A, E, and K2. While not a health food, it does contribute more than just “empty calories.”
Health Benefits: In moderation, this dessert can be part of a balanced diet. The fat and protein content can help curb sugar cravings by providing lasting fullness. The psychological benefit of enjoying a homemade, portion-controlled treat is also significant for sustainable eating habits. Choosing this over highly processed, additive-laden desserts gives you control over ingredient quality.
Dietary Considerations: This standard recipe contains gluten (graham crackers), dairy, and eggs (if using vanilla extract containing alcohol). It is also high in sugar and saturated fat. Individuals with lactose intolerance, celiac disease, or following specific heart-healthy or low-sugar diets would need to consider the adaptations discussed in the Dietary Adaptations section.
Portion Analysis: The individual cup format is a powerful tool for mindful eating. It provides a predefined, reasonable portion, helping to prevent overindulgence that can easily happen when slicing from a whole pie. One cup is a satisfying dessert serving that fits into many daily calorie budgets when planned for.
Weight Management Tips: If you are watching your weight, you can still enjoy this dessert. Plan for it by adjusting other meals that day to be lighter. Savor it slowly to maximize satisfaction. You can also employ the dietary adaptations to reduce sugar or fat content. Remember, deprivation often backfires; a planned, portion-controlled treat can support long-term dietary goals.
Dietary Adaptations
Gluten-Free: Replace the graham crackers with an equal amount of certified gluten-free graham-style crackers or cookies. Another excellent option is to use 1 ½ cups of almond flour mixed with 2 tablespoons of sugar and 5 tablespoons of melted butter for the crust. Press and bake at 350°F for 8-10 minutes to set before adding filling.
Dairy-Free: Use a high-quality, firm plant-based cream cheese (such as those made from cashews or almonds). For the whipped component, chill a can of full-fat coconut milk overnight, scoop out the solid cream, and whip it with a tablespoon of powdered sugar. The crust can be made with dairy-free butter or coconut oil.
Vegan: Combine the dairy-free adaptations above. Use vegan graham crackers or an almond flour crust bound with coconut oil. Ensure your sugar is vegan (some refined white sugar uses bone char). Agar-agar can be used as a stabilizer if your coconut whip is not holding peaks well; dissolve 1 tsp in 3 tbsp of plant milk, heat until dissolved, cool slightly, and whip into the cream cheese mixture.
Low-Carb/Keto: For the crust, use 1 ½ cups of finely ground almonds or pecans mixed with 2 tbsp of granulated erythritol (like Swerve) and 5 tbsp of melted butter. For the filling, use full-fat cream cheese, heavy cream, and a keto-friendly sweetener like powdered erythritol or monk fruit blend to taste. Omit the graham crackers entirely.
Paleo: The crust can be made from a mix of almond flour, coconut flour, and chopped nuts bound with coconut oil or ghee. Sweeten with a touch of maple syrup or honey. For the filling, a cashew-based cream is common in paleo baking: soak raw cashews, blend until super smooth with coconut cream, lemon juice, and honey, then chill to set.
Low-FODMAP: Use lactose-free cream cheese and ensure your heavy cream is lactose-free (most heavy cream is very low in lactose). For the crust, gluten-free graham crackers may be suitable if they don’t contain high-FODMAP ingredients like honey or high-fructose corn syrup; alternatively, use a simple crust made from oats (if tolerated) or almond meal.
Reduced-Sugar: Cut the granulated sugar in both the crust and filling by one-third to one-half. You can also use a sugar substitute like monk fruit or stevia blend designed for baking. Enhance flavor with extra vanilla extract or a pinch of spice like cinnamon to compensate for the reduced sweetness.
Troubleshooting Guide
Filling is Too Soft/Runny: This usually means the cream was under-whipped or the cups did not chill long enough. Solution: Ensure you whip the cream to truly stiff peaks. Next time, chill the cups for a full 4 hours, preferably overnight. If already assembled, you can try placing them Print
No Bake Cheesecake Cups
- Total Time: 4 hours 15 minutes
- Yield: 6
Description
Easy and creamy individual cheesecake cups with a graham cracker crust, requiring no baking and perfect for quick desserts.
Ingredients
- 1 1/2 cups graham cracker crumbs
- 1/4 cup melted butter
- 16 ounces cream cheese, softened
- 1/2 cup granulated sugar
- 1 teaspoon vanilla extract
- 1 cup heavy whipping cream
- Fresh berries for topping
Instructions
- Mix graham cracker crumbs with melted butter until combined, then press into the bottom of serving cups.
- In a large bowl, beat cream cheese, sugar, and vanilla until smooth and creamy.
- In a separate bowl, whip heavy cream until stiff peaks form, then fold into cream cheese mixture until fully incorporated.
- Spoon cheesecake filling over crust in cups, smooth tops, and refrigerate for at least 4 hours or until set.
- Top with fresh berries before serving.
Notes
You can customize the seasonings to taste.
- Prep Time: 15 minutes
- Cook Time: 0 minutes
- Method: Dessert
- Cuisine: American