Greek Loaded Hummus: A Vibrant Mediterranean Appetizer Recipe
Imagine a creamy, dreamy canvas of hummus transformed into a stunning, edible landscape. This Greek loaded hummus recipe does exactly that. It elevates the classic chickpea dip into a complete centerpiece for your table. Moreover, it bursts with the vibrant, sun-drenched flavors of the Mediterranean. Consequently, every scoop delivers a perfect harmony of textures and tastes. This dish is not just food; it is a celebration on a plate. Ultimately, it is the ultimate shareable appetizer for any gathering.
The beauty of this Greek loaded hummus lies in its simplicity and visual impact. You start with a lusciously smooth base of traditional hummus. Then, you artfully arrange a colorful mosaic of classic Greek salad ingredients on top. Think juicy tomatoes, crisp cucumbers, briny Kalamata olives, and creamy feta cheese. Furthermore, a generous drizzle of extra virgin olive oil and a sprinkle of dried oregano tie everything together. The result is a dip that is as nutritious as it is delicious. It is a guaranteed crowd-pleaser that requires minimal cooking skill.
This recipe is your secret weapon for effortless entertaining. It comes together in about twenty minutes with mostly pantry staples. Additionally, it is incredibly versatile and adaptable to your preferences. Whether you are hosting a summer barbecue, a game day party, or a casual family dinner, this loaded hummus fits right in. It invites people to gather, share, and enjoy. So, get ready to dive into a bowl of pure Mediterranean joy. This Greek loaded hummus recipe will become your new favorite appetizer.
Quick Recipe Highlights
- Flavor Profile: This Greek loaded hummus delivers a bright, tangy, and savory experience. The creamy, earthy hummus base perfectly complements the salty feta and briny olives. Meanwhile, fresh vegetables add a juicy, refreshing contrast.
- Texture: Enjoy a delightful play of textures in every bite. The silky-smooth hummus contrasts with the crunchy cucumber and crisp bell pepper. Additionally, the creamy feta and firm chickpeas add further depth.
- Aroma: The scent of fresh lemon juice and garlic hits you first. Then, the earthy aroma of tahini and the herbal note of dried oregano complete the inviting fragrance.
- Visual Appeal: This dish is a feast for the eyes with its rainbow of colors. The red tomatoes, green cucumbers and peppers, purple onions, and white feta create a stunning mosaic against the pale hummus.
- Skill Level Needed: This is a beginner-friendly, no-cook recipe. Essentially, it involves simple chopping, mixing, and assembling. No advanced techniques are required.
- Special Equipment: You only need a food processor or blender for the hummus base. Otherwise, a good knife and cutting board are your main tools.
Recipe Overview
- Difficulty Level: This recipe is rated easy for a clear reason. There is no actual cooking involved, just assembly and simple prep. The hummus base requires basic food processor operation. Meanwhile, the topping involves straightforward vegetable chopping. Anyone can achieve fantastic results on the first try.
- Category: This dish falls squarely into the appetizer and snack category. It is perfect for parties, potlucks, or a flavorful afternoon bite. Furthermore, it can easily serve as a light lunch or dinner when paired with hearty bread or a side salad.
- Cuisine: This is a modern fusion recipe with deep roots in Mediterranean and Middle Eastern cuisines. It combines the classic Levantine hummus with the iconic ingredients of a Greek salad. The result honors both culinary traditions beautifully.
- Cost: This is a very cost-effective dish, especially if you make the hummus from scratch. Canned chickpeas, tahini, and basic vegetables are inexpensive pantry items. Premium ingredients like good olive oil and feta cheese are worth the splurge but can be adjusted for budget.
- Season: This loaded hummus is fantastic year-round but truly shines in spring and summer. That is when tomatoes, cucumbers, and peppers are at their peak freshness and flavor. It is a refreshing counterpoint to hot weather.
- Occasion: It is ideal for casual entertaining, picnics, and potlucks. It also makes a wonderful starter for a Mediterranean-themed dinner party. Moreover, it is perfect for healthy meal prep as a ready-to-eat snack.
Why You’ll Love This Recipe
First and foremost, the taste and texture are utterly irresistible. The creamy, garlicky hummus provides a rich foundation. Then, the toppings explode with freshness. You get the juicy pop of tomato, the cool crunch of cucumber, and the salty punch of feta. Every single bite is a complex and satisfying flavor journey. The lemon juice and olive oil brighten everything up. Consequently, it is impossible to stop at just one scoop. This Greek loaded hummus is genuinely addictive in the best possible way.
Next, consider the sheer convenience. This recipe is a lifesaver for busy hosts. You can prepare the hummus base days in advance. Then, simply chop the vegetables and assemble the platter right before serving. There is no need to turn on the oven or stand over a hot stove. Additionally, it is a one-bowl wonder that minimizes cleanup. You get maximum impact with minimal effort. This makes it a reliable go-to for spontaneous gatherings or when you need a stunning dish fast.
From a nutritional standpoint, this loaded hummus is a powerhouse. Chickpeas are loaded with plant-based protein and fiber, which keeps you full. Tahini provides healthy fats and essential minerals like calcium and iron. The vegetable toppings add a huge dose of vitamins, antioxidants, and hydration. Choosing this dip means you are nourishing your body with whole, real ingredients. It is a delicious way to eat healthily without feeling like you are on a diet.
Socially, this dish is a superstar. Placing a beautiful bowl of Greek loaded hummus in the center of the table naturally brings people together. It encourages conversation and sharing. It is a interactive food experience that breaks the ice at any party. Guests can customize their bites, choosing their favorite toppings. This communal aspect turns simple eating into a memorable event. It is more than an appetizer; it is a social catalyst.
Finally, it is incredibly cost-effective and accessible. The ingredients are easy to find at any standard grocery store. You likely have many of them in your kitchen already. Making hummus from scratch is significantly cheaper than buying premium store-bought versions. You can also easily scale the recipe up or down based on your guest count. This Greek loaded hummus delivers restaurant-quality presentation and flavor at a fraction of the cost. It is a smart choice for your wallet and your taste buds.
Historical Background and Cultural Significance
Hummus itself has a history spanning centuries, with roots in the Middle East. While its exact origin is debated among Lebanon, Israel, Palestine, and Egypt, its popularity is universal. Traditionally, hummus is a simple paste of chickpeas, tahini, lemon, and garlic. It was a staple food, providing affordable and nutritious sustenance. Over time, it spread across the Mediterranean and the globe. Today, it is beloved as a healthy dip, spread, and side dish. Its evolution from humble staple to global phenomenon is remarkable.
The “loaded” or “supreme” hummus trend is a more recent innovation, largely popularized by modern food culture and social media. It takes the traditional base and turns it into a complete meal or shareable platter. This reflects a contemporary dining preference for interactive, visually stunning, and ingredient-abundant dishes. The Greek variation specifically taps into the worldwide love for Greek salad flavors. This fusion creates a bridge between two iconic culinary traditions. It is a beautiful example of how food evolves through cultural exchange.
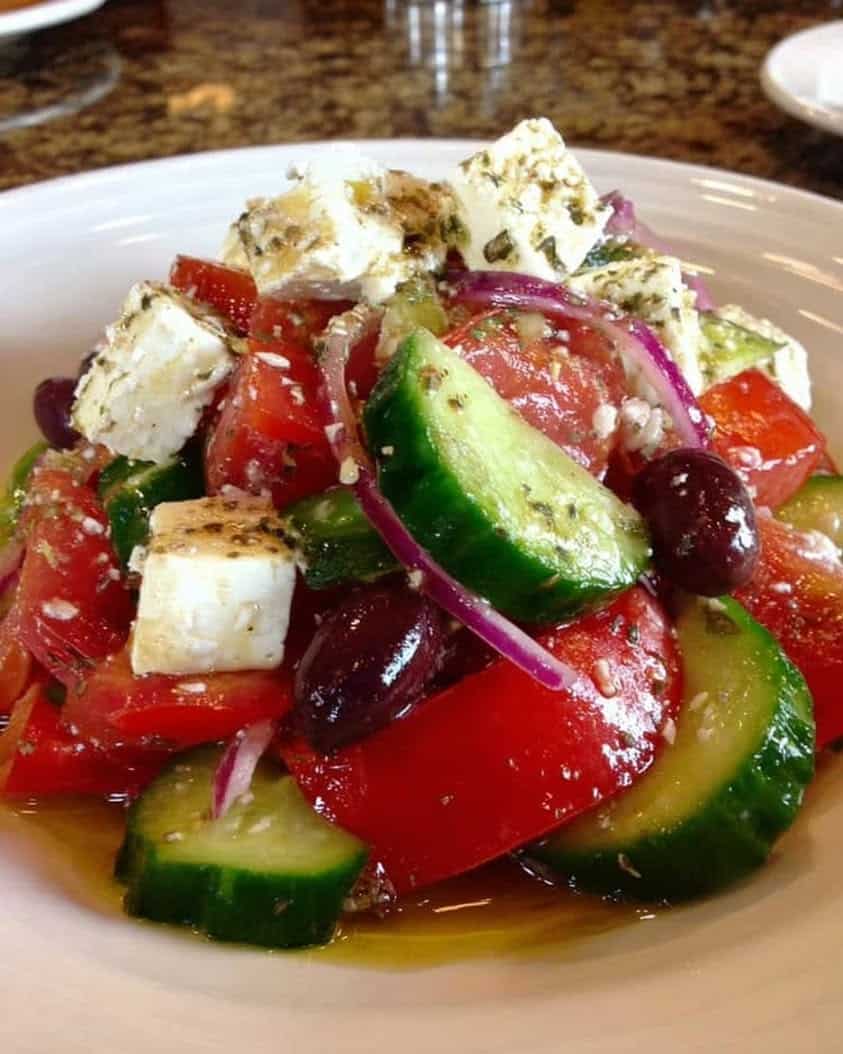
Greek salad, or “Horiatiki,” is the inspiration for the toppings. This classic peasant salad originated in rural Greece. It traditionally features tomatoes, cucumbers, onions, olives, and feta cheese, dressed simply with olive oil and oregano. Its ingredients are a reflection of the Greek landscape and climate. Combining these vibrant, fresh elements with creamy hummus is a logical and delicious progression. It marries the hearty, earthy comfort of Levantine food with the bright, fresh ethos of Greek cuisine.
This recipe’s cultural significance lies in its celebration of shared Mediterranean culinary principles. Both traditions emphasize fresh, seasonal produce, healthy fats like olive oil, and bold, simple flavors. They prioritize communal eating and sharing food from a common plate. This Greek loaded hummus recipe honors these values. It is a modern dish built on ancient, wholesome foundations. Serving it is a way to connect with these rich food histories while enjoying a creation that is entirely of the moment.
Ingredient Deep Dive
Chickpeas (Garbanzo Beans): Chickpeas are one of the oldest cultivated legumes, with a history in the Middle East dating back over 7,000 years. They are a nutritional powerhouse, packed with plant-based protein, fiber, and key minerals like iron and folate. For the smoothest hummus, many pros recommend peeling the chickpeas after rinsing. However, for a loaded version where texture is varied, leaving the skins on is perfectly fine and saves time. If using canned, always rinse them thoroughly to remove the starchy liquid and reduce sodium.
Tahini: Tahini is a paste made from toasted, ground sesame seeds. It is a cornerstone of Levantine cuisine. High-quality tahini should be pourable and smooth, with a deep, nutty flavor without bitterness. Stir the jar well before using, as the oil naturally separates. It provides healthy fats, calcium, and gives hummus its signature creamy texture and rich taste. Do not skip it; it is essential. For a nut-free version, you could experiment with sunflower seed butter, but the flavor profile will change significantly.
Extra Virgin Olive Oil: This is the lifeblood of Mediterranean cooking. Look for a bottle labeled “extra virgin” and preferably from a single region. A good, fruity, peppery olive oil adds immense flavor both in the hummus and as a finishing drizzle. It is rich in heart-healthy monounsaturated fats and antioxidants. Store it in a cool, dark place to prevent rancidity. The quality of your olive oil will directly impact the taste of your final dish, so use the best you can afford for drizzling.
Feta Cheese: Authentic Greek feta is made from at least 70% sheep’s milk, sometimes blended with goat’s milk. It is brined, giving it a distinctive tangy and salty flavor. It crumbles beautifully and adds a creamy, salty contrast to the fresh vegetables. For the best taste, buy feta in a block stored in brine rather than pre-crumbled. If you need a dairy-free version, a firm, brined tofu or a vegan feta alternative can work, though the flavor will be different.
Kalamata Olives: These dark purple, almond-shaped olives are named after the city of Kalamata in Greece. They are typically preserved in wine vinegar or olive oil, giving them a rich, fruity, and slightly winy flavor compared to standard black olives. They add a crucial briny, umami element. Look for them with the pits in for better flavor and texture, and simply pit them by crushing with the side of a knife. Their deep color also adds visual drama to the platter.
Common Mistakes to Avoid
- Using Unrinsed Canned Chickpeas: The liquid in canned chickpeas, called aquafaba, is starchy and can make your hummus gluey. Always drain and rinse the chickpeas thoroughly under cold water. This step ensures a cleaner, brighter chickpea flavor and a smoother texture.
- Skimping on the Tahini: Tahini is not just a minor ingredient; it is essential for authentic flavor and creaminess. Using too little will result in a bland, bean-heavy dip. Do not substitute it with peanut butter or other nut butters, as the flavor will be completely different.
- Overprocessing the Hummus: While you want a smooth base, blending the hummus for too long can actually warm it up and make it gummy. Process just until supremely smooth and creamy. If it seems thick, add ice water (not tap water) a tablespoon at a time to loosen it.
- Adding Toppings Too Early: If you assemble the fully loaded hummus platter hours in advance, the vegetables will release their water and make the top layer soggy. Prepare the hummus base and chop the veggies ahead, but assemble just before serving for the best texture.
- Using Low-Quality Olive Oil: A bland or rancid olive oil will flatten the entire dish. Since the oil is a primary flavor component, use a good-quality extra virgin olive oil, especially for the final drizzle. You will taste the difference immediately.
- Forgetting to Season the Hummus Base: The toppings are flavorful, but the hummus itself needs to be well-seasoned. Taste the plain hummus and adjust the salt, lemon, and garlic before spreading it on the platter. A bland base cannot be saved by toppings alone.
- Chopping Vegetables Inconsistently: Huge chunks of tomato or cucumber are difficult to scoop. Conversely, a tiny dice can make the topping seem like a salsa. Aim for a medium, uniform dice so each component is distinct and easy to eat with pita bread.
- Neglecting the Garnish: The final drizzle of oil, sprinkle of oregano, and perhaps a pinch of paprika or sumac are not just decorative. They add essential aroma and flavor layers. Do not skip these finishing touches; they elevate the dish from homemade to professional.
Essential Techniques
Processing to Ultra-Smooth Consistency: The key to restaurant-quality hummus is achieving a silky, light texture, not a grainy paste. Start by processing the tahini and lemon juice first; this “whips” the tahini and creates an emulsified base. Then add the garlic and chickpeas. Process for a full 2-3 minutes, scraping down the sides as needed. If the mixture is too thick or the blades are struggling, add ice water one tablespoon at a time. The ice water helps keep the mixture cool and incorporates seamlessly for a fluffier result.
Balancing Flavors by Taste: Hummus is all about the perfect balance of nutty, tangy, garlicky, and salty. After blending, you must taste and adjust. Does it need more lemon for brightness? More salt to enhance the chickpeas? Another small clove of garlic for punch? The amounts in the recipe are guidelines. Your personal taste, the brand of your tahini, and the saltiness of your chickpeas all vary. Adjust gradually until it sings.
Creating an Appealing Presentation: For a loaded hummus, presentation is part of the technique. Use the back of a spoon to create swoops and wells in the hummus base on your platter. This creates pockets for the olive oil to pool and gives visual texture. Then, arrange the toppings in distinct sections or a colorful mosaic, rather than dumping them in a pile. This thoughtful assembly makes the dish look abundant and artful, inviting people to dig in.
Pro Tips for Perfect Greek Loaded Hummus
For an incredibly smooth hummus, take the extra minute to peel your canned chickpeas. Simply rub them between your hands or a clean kitchen towel; the skins will slip right off. This step eliminates any graininess.
Use ice-cold water, not tap water, to thin your hummus if needed. The cold temperature helps maintain a bright flavor and prevents the fats from breaking down during blending.
Let your hummus base rest. After blending, cover it and let it sit at room temperature for 30 minutes before assembling. This allows the flavors to meld and deepen beautifully.
For the best tomato flavor, use ripe, in-season cherry or grape tomatoes. They are typically sweeter and less watery than large off-season tomatoes. Simply halve or quarter them.
To prevent a soggy platter, place your chopped cucumbers and tomatoes in a colander and sprinkle with a pinch of salt. Let them drain for 10 minutes to remove excess water before arranging.
Warm your pita bread! Lightly toasting pita wedges in the oven or a dry skillet until warm and slightly crispy makes a world of difference. It provides a perfect textural contrast to the creamy dip.
Add a surprise element. Consider sprinkling a pinch of sumac or smoked paprika over the finished platter. These spices add a tangy or smoky depth that complements the other flavors wonderfully.
Make it a meal. Transform this appetizer into lunch by serving it with grilled chicken skewers or a hearty lentil salad on the side. The loaded hummus becomes a flavorful and satisfying centerpiece.
Variations and Adaptations
For regional variations, look to other Mediterranean flavors. A “Turkish” version could include spicy chili flakes (pul biber), fresh mint, and a drizzle of pomegranate molasses. A “Lebanese” twist might feature fried ground lamb (lahmajoun-style), pine nuts, and a dusting of sumac. The basic formula is endlessly adaptable to the flavor profiles you love most.
Seasonal adaptations are easy. In winter, use roasted vegetables like bell peppers, zucchini, and red onion as toppings instead of fresh. In fall, add roasted squash or pumpkin seeds for crunch. The hummus base remains constant, while the toppings celebrate what is fresh and available.
For dietary modifications, this recipe is naturally vegetarian and can be made gluten-free with gluten-free pita or veggie sticks. To make it vegan, simply omit the feta cheese or use a high-quality vegan alternative. The dish remains vibrant and satisfying without it.
Flavor variations can start with the hummus itself. Try adding roasted red peppers, a handful of fresh herbs like parsley or dill, or a spoonful of harissa paste to the food processor for a differently flavored base. Then, choose toppings that complement that new base flavor.
Texture modifications can cater to different preferences. For extra crunch, add toasted pine nuts or chopped walnuts on top. For a creamier element, add dollops of tzatziki sauce or Greek yogurt alongside the feta. Do not be afraid to mix and match textures.
Presentation alternatives include serving individual portions in small bowls or mason jars for a party. You can also create a “hummus bar” where guests build their own loaded hummus plates with an array of topping choices. This interactive approach is always a hit.
Serving and Presentation Guide
Plating is key. Choose a wide, shallow bowl or a large platter with a slight lip. Use the back of a spoon to spread the hummus, creating swirls and ridges. These textures catch the olive oil and garnishes, making the dish look dynamic and professional. Leave a slight border around the edge for a clean look.
Garnishing should be both beautiful and functional. A generous drizzle of your best olive oil is non-negotiable. Then, sprinkle with dried oregano, a pinch of flaky sea salt, and perhaps some fresh chopped parsley or dill. For color, a light dusting of paprika or sumac adds a final touch.
Traditional accompaniments include warm pita bread, cut into wedges. For a more authentic experience, offer both pita and raw vegetable crudités like carrot sticks, bell pepper strips, and radishes. This provides variety for your guests and adds more fresh crunch.
Modern serving suggestions might include grilled flatbread, crispy pita chips, or even pretzel crisps for a sweet-and-salty contrast. You can also serve it alongside other mezze like dolmas, falafel, or spanakopita for a full Mediterranean feast.
Temperature considerations are simple: the hummus should be at cool room temperature. Do not serve it ice-cold from the fridge, as this mutes the flavors. Take it out about 15-20 minutes before serving. The vegetables should be fresh and crisp.
Portion control is easy with a loaded platter. As a substantial appetizer for 6-8 people, this recipe is perfect. For a larger crowd, simply double the recipe and use an even larger platter. Remember, people will eat more of a delicious, shareable dish like this.
Wine and Beverage Pairing
Wine pairings should complement the dish’s bright acidity and Mediterranean flavors. A crisp, dry white wine like Assyrtiko from Greece or a Sauvignon Blanc works beautifully. Their citrus notes mirror the lemon in the hummus. Alternatively, a light, fruity rosé can handle the saltiness of the feta and olives. For red wine lovers, choose a light-bodied, low-tannin red like a Beaujolais or a Greek Xinomavro.
Non-alcoholic alternatives are just as important. Freshly squeezed lemonade or limeade enhances the citrus elements. Sparkling water with a squeeze of lemon and a few cucumber slices is incredibly refreshing. For something herbal, a mint iced tea or a chilled ginger brew would be delightful.
While not typical for an appetizer, if serving this as a light meal, a medium-roast coffee or a mint tea after eating would be lovely. The clean finish of these beverages complements the garlic and olive oil without clashing.
Temperature is crucial. White wines, rosés, and non-alcoholic drinks should be well-chilled. This cold refreshment provides a perfect counterpoint to the rich, savory dip. Have plenty of ice on hand to keep drinks cold throughout the gathering.
Serving suggestions include setting up a small beverage station near the food. Offer a choice of a white wine and a signature non-alcoholic drink in pitchers. This allows guests to help themselves and keeps the hosting effort low.
Storage and Shelf Life
Store leftover assembled hummus with toppings in an airtight container in the refrigerator. It is best consumed within 24 hours, as the vegetables will soften and release moisture. The hummus base alone, without toppings, will keep beautifully for up to 4-5 days in a sealed container.
Temperature requirements are straightforward: always refrigerate. Do not leave the loaded hummus platter at room temperature for more than two hours to prevent bacterial growth. If your party is longer, consider setting out a smaller portion and refilling from the fridge.
Container recommendations include glass containers with tight-fitting lids for the hummus base. For the chopped vegetables, store them separately in their own containers or zipper bags with a paper towel to absorb excess moisture. This keeps everything fresh for assembly later.
Signs of spoilage include an off or sour smell, a significant change in color, or visible mold. If the hummus base develops a layer of liquid on top, you can simply stir it back in; this is normal separation. However, if it smells fermented, discard it.
Reheating is not applicable for this cold dish. Simply take it from the fridge and let it sit for 15-20 minutes to take the chill off before serving again. The flavors are best at a cool room temperature, not ice cold.
Freezing is not recommended for the loaded version. However, you can freeze the plain hummus base (without toppings) for up to 3 months. Thaw overnight in the refrigerator and stir well before using. The texture may be slightly less creamy but will still be good.
Make Ahead Strategies
Your prep timeline can be spread over two days. Day 1: Make the hummus base, transfer to an airtight container, and refrigerate. Chop all your vegetables (except tomatoes, which are best chopped day-of), and store them separately in containers with a paper towel. Day 2: Remove the hummus from the fridge 30 minutes before serving to soften. Chop tomatoes, assemble the platter, and garnish.
Storage between steps is key to freshness. Keep the hummus base and each vegetable component in its own container. This prevents flavors from mingling prematurely and keeps textures intact. The feta can be crumbled ahead and stored in a small container as well.
The quality impact of making the hummus ahead is actually positive. Allowing the hummus to rest overnight lets the garlic mellow and the flavors marry, resulting in a deeper, more rounded taste. The texture may firm up in the fridge, but it will loosen as it comes to room temperature.
Assembly tips for last-minute ease: Have all your prepped ingredients lined up. Spread the hummus on the platter first. Then, quickly arrange the vegetables in sections or a colorful pattern. Finally, add the feta, drizzle with oil, and sprinkle herbs. The whole process should take just 5 minutes before serving.
Reheating guidelines do not apply, but “refreshing” does. If your hummus base seems too thick after refrigeration, stir in a teaspoon of warm water or lemon juice to bring back a creamy, spreadable consistency before plating.
Fresh element additions are the final touch. Always add delicate herbs like fresh dill or parsley, the final drizzle of oil, and a sprinkle of flaky salt right before serving. This ensures they look vibrant and taste their best.
Scaling Instructions
Halving the recipe is simple for a smaller snack. Use half a can of chickpeas (or save the rest for salad) and scale all other ingredients down proportionally. A mini food processor works great for small batches. The assembly platter will just be more intimate.
Doubling or tripling for a party is easy. Simply multiply all ingredient quantities. You may need to make the hummus in two batches in your food processor to avoid overfilling it. Use an extra-large platter or even a rimmed baking sheet lined with parchment for a dramatic presentation.
Equipment adjustments may be needed when scaling up. A large food processor (11-cup or larger) is ideal for big batches. If you only have a small one, just make multiple batches. For serving, ensure you have a platter large enough so the hummus isn’t piled too high; you want a wide surface area for toppings.
Timing modifications are minimal. Making a double batch of hummus takes only marginally longer than a single batch. The vegetable chopping time will increase linearly. Overall, factor in an extra 10-15 minutes of prep time when doubling the recipe.
Storage considerations remain the same per component. You will just have more containers in your fridge. Label them if you are prepping days ahead. A large batch of hummus base will keep just as well as a small one.
Nutritional Deep Dive
This Greek loaded hummus is a macro-balanced snack. The chickpeas and tahini provide a solid combination of plant-based protein and healthy fats, while the vegetables contribute complex carbohydrates and fiber. This macronutrient profile helps regulate blood sugar and provides sustained energy, making it far more satisfying than typical chips and dip.
The micronutrient analysis is impressive. Chickpeas offer iron, folate, and phosphorus. Tahini is rich in calcium, copper, and manganese. The fresh vegetables are loaded with vitamins A, C, and K, along with potassium. The olive oil provides vitamin E and potent antioxidants. Together, they support heart health, bone health, and immune function.
Specific health benefits include promoting digestive health due to high fiber content. The monounsaturated fats from olive oil and tahini support healthy cholesterol levels. The antioxidants in the vegetables and olive oil combat inflammation. This dish is a delicious example of food as medicine.
Dietary considerations are mostly positive. It is naturally vegetarian, nut-free, and can be made gluten-free and vegan with simple swaps. However, those on a low-FODMAP diet may need to be cautious with chickpeas and garlic, though small serving sizes may be tolerable.
Portion analysis suggests a serving (about 1/6th of the platter) is a substantial and satisfying snack. It is calorie-dense from the healthy fats, so mindful eating is encouraged. Enjoy it with plenty of the fresh vegetable toppings to increase volume and nutrients without adding many calories.
For weight management, this recipe is an excellent tool. Its high protein and fiber content promote satiety, helping you feel full longer. Using it as a dip for fresh vegetables instead of pita chips can further reduce calorie intake while maximizing nutrient density.
Dietary Adaptations
For a gluten-free version, this recipe is already nearly there. Simply ensure your tahini is certified gluten-free (most are), and serve with gluten-free pita bread, crackers, or an array of vegetable crudités. Cross-contamination is rarely an issue with these whole ingredients.
A dairy-free or vegan adaptation is straightforward: omit the feta cheese. The dish will still be bursting with flavor from the olives, vegetables, and herbs. For a cheesy element, you can sprinkle on a vegan feta alternative or nutritional yeast. The creamy hummus base is already dairy-free.
For a low-carb or keto approach, focus on the hummus and high-fat toppings. Chickpeas are higher in carbs, so you could use a base made from steamed cauliflower blended with tahini and lemon. Load it with olives, feta, and a drizzle of olive oil, and serve with cucumber slices and bell pepper strips for dipping.
A Paleo adaptation would also require a substitute for the chickpeas and legumes. A “hummus” made from roasted zucchini or avocado could serve as the base. Top it with all the traditional Greek salad ingredients. The flavors will still be Mediterranean, aligning with the spirit of the recipe.
For a low-FODMAP version, the garlic and chickpeas are the main concerns. You can infuse the olive oil with garlic flavor by warming it with a clove, then removing the clove. Use a small portion of canned, rinsed chickpeas (a 1/4 cup per serving is often tolerated) or substitute with canned, rinsed butter beans for the base.
Troubleshooting Guide
If your hummus is too thick or grainy, the most likely culprit is insufficient liquid or processing time. With the motor running, slowly add ice water, one tablespoon at a time, until it becomes smooth and creamy. Process for a full 2-3 minutes; the friction helps break down the chickpeas completely.
If the flavor is bland, you probably underseasoned. Hummus needs a surprising amount of salt and lemon to balance the earthiness of the chickpeas and tahini. Add more salt and fresh lemon juice in small increments, tasting after each addition, until the flavors pop.
If the hummus is too bitter, it could be due to old tahini or too much garlic. Tahini can go rancid, so always taste it before using. If using a new jar and it’s still bitter, balance it with a touch more lemon juice and a pinch of sweet paprika. Bitter garlic usually means the green germ inside wasn’t removed.
If the toppings make the platter watery, you assembled too early. For next time, salt your cucumbers and tomatoes and let them drain before using. For now, you can carefully tilt the platter to pour off excess liquid, or use a baster to remove it. Stirring it in will make the whole dip watery.
If you lack a food processor, you can use a high-powered blender, but you may need to double the recipe for the blades to catch. In a pinch, you can mash the chickpeas very thoroughly with a fork or potato masher, then whisk in the other ingredients. The texture will be chunkier but still tasty.
If you are out of an ingredient, remember the core trio is chickpeas, tahini, and lemon. For the toppings, be flexible. No Kalamatas? Use green olives. No red onion? Use shallots or green onion. No cucumber? Add extra bell pepper. The recipe is very forgiving.
Recipe Success Stories
Community feedback on this Greek loaded hummus recipe consistently highlights its wow factor. Home cooks love how it impresses guests with minimal effort. Many report that it has become their signature party dish. One reader said it was the first thing to disappear at a potluck, with multiple people asking for the recipe. Another mentioned that their kids, who usually avoid vegetables, happily scooped them up when presented this way.
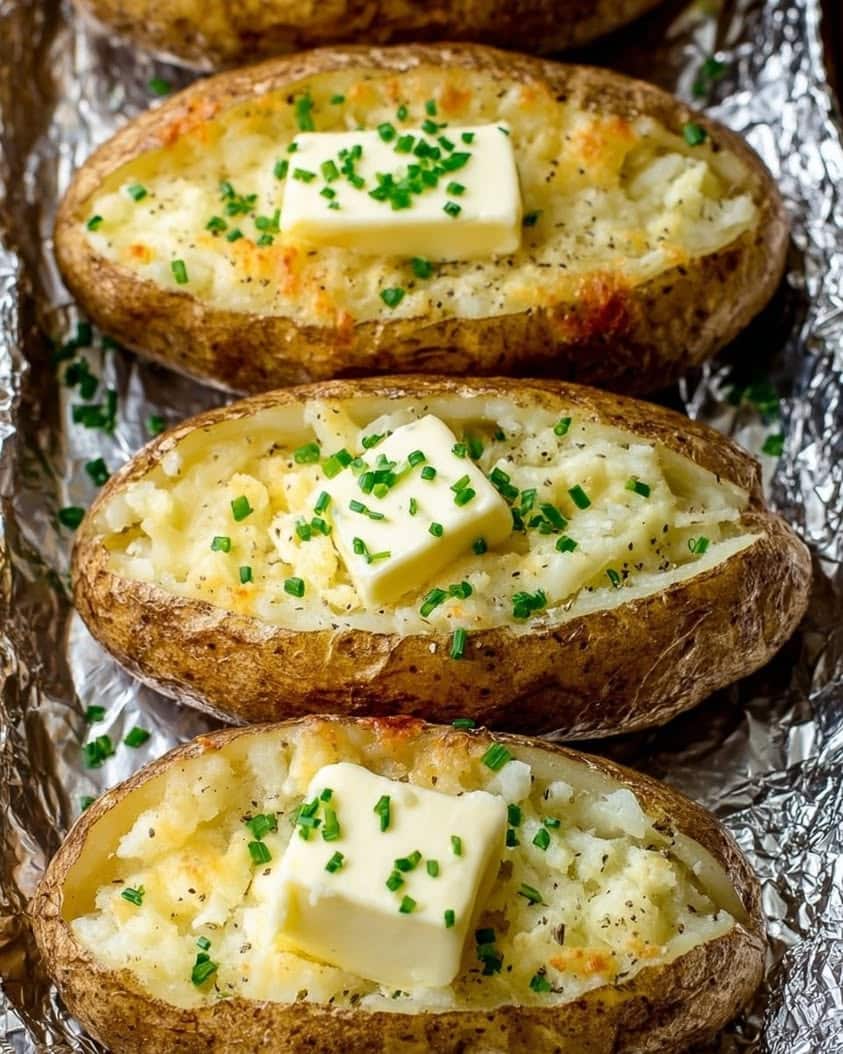
Variation successes are fun to hear about. Some have added grilled chicken or shrimp on top to make it a full meal. Others have used it as a filling for wraps or a topping for baked potatoes. One creative cook made a “Thanksgiving” version with leftover turkey, cranberries, and walnuts. The basic formula inspires endless creativity.
Adaptation stories from those with dietary restrictions are particularly rewarding. Vegan friends have raved about how satisfying it is without the feta. Gluten-free guests appreciate having a stunning, safe option to enjoy. These adaptations prove that delicious, beautiful food can be inclusive for everyone at the table.
Reader suggestions have improved the recipe over time. The tip about salting and draining cucumbers came from a reader. Another suggested adding a sprinkle of za’atar alongside the oregano. This collaborative spirit makes the recipe a living, evolving guide. We encourage you to make it your own and share your discoveries.
Photography tips from successful makers include using natural light and a simple, neutral-colored platter to let the colors of the food shine. Getting a close-up shot of a pita bread scooping up all the layers is always appealing. Remember, the vibrant colors are your best asset—show them off!
Frequently Asked Questions
Can I use store-bought hummus? Absolutely. To save time, use a high-quality plain store-bought hummus. However, making it from scratch allows you to control the flavor, texture, and ingredients, and it often tastes fresher and more vibrant. If using store-bought, let it come to room temperature and give it a good stir before spreading.
How long does loaded hummus last in
Print A creamy hummus topped with fresh Greek-inspired vegetables, feta cheese, and a drizzle of olive oil for a vibrant appetizer or snack. You can customize the seasonings to taste.Greek Style Loaded Hummus
Description
Ingredients
Instructions
Notes